Friday, October 29, 2010

Slow-Rise, Kneaded White Sandwich Bread: Basic & Water-Roux (Baked)


[ Equipment: slow cooker or oven. For more information about the terminology in this recipe, see Low Temperature Baking: A Journey of 3 Paths ].

These loaves make excellent sandwiches. The 2 versions differ in the crispness of the crust and the texture. The plain bread has the crispier crust and a firmer, more closed crumb. The water roux loaf is softer, chewier, fluffier, with a more open crumb. Both are tasty straight out of the oven (the roux loaf has an almost creamy taste despite the lack of dairy) and compare well with loaves baked at high temperatures.

Like my previous loaves, these breads are slow rise, but are relatively easy to make and bake at a single temperature, not in a rising or falling oven. They are "real" loaves. Each one weighs almost 1 lb. (14 oz./400 gr.) and measures 8 x 4 x 2-1/4 (inches), which is adequately large to qualify as a true sandwich loaf. Although the incorporation of a water roux in one loaf is supposed to extend freshness, both breads are best eaten on the same day they're baked. After that time, slices can be revived with a quick steaming or a light toasting.

These seemingly simple recipes have spent several months in research and testing, but all the effort has been worth it because the techniques will be applied to baking other types of breads at low temperature. I began work on them a few days after I posted the White Bread-Mini Loaf recipe. I ate the last slices of a sandwich bread from the local market. Rather than buy a new loaf, I decided it was time to try baking my own.

To be a successful sandwich loaf for me on all fronts, it had to be tasty with and without toasting. My first focaccia bread was a dry, coarse bread that bloomed in flavor only when briefly toasted. Although the mini loaf had better texture, the recipe and technique didn't scale well (the "enlarged" loaf had a dry and tough crumb), and was a little complicated for an everyday bread. A loaf also had to be of adequate size. The mini loaf was fine for bite-size sandwiches, but the entire loaf could be eaten in minutes. The size of my oven limited the maximum size of the loaf. All of my LTB ovens were converted slow cookers, and the biggest one was a 5.5-quart, which could accommodate an 8 x 4 x 2-3/8 (inch) loaf pan. While that wouldn't be the largest loaf of bread around, it would do.

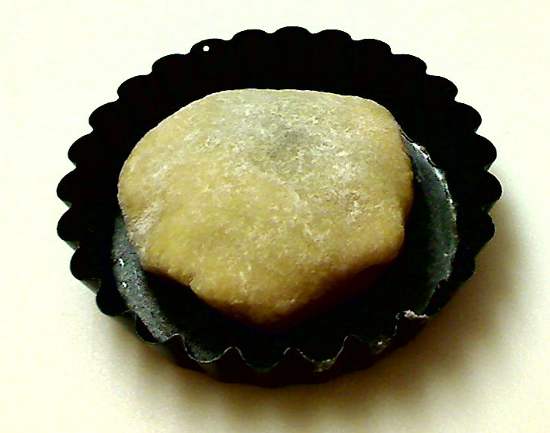
A review of my earlier recipes suggested that the bread grain had gelatinized from excessive exposure to high moisture and heat, resulting in the hard, coarse texture. I broke the problem down into 2 parts: too much moisture and too much oven time. One way to counter those conditions would be to start baking the loaf at 250°F (as opposed to steaming it first as I did in my mini-loaf) to heat up the dough quickly and begin cooking the interior sooner. However, the higher heat alone could overbake the bread near the sides of the pan, which could dry out rock hard. There was also the matter of even browning. Large loaves tend to brown very, very slowly on their top surfaces than on the sides. My second fix was be to borrow an idea from commercial bakeries and lid the pan with foil for a pullman-style loaf. Commercial pullman loaves brown evenly on all sides, because all surfaces of the dough touch hot metal.


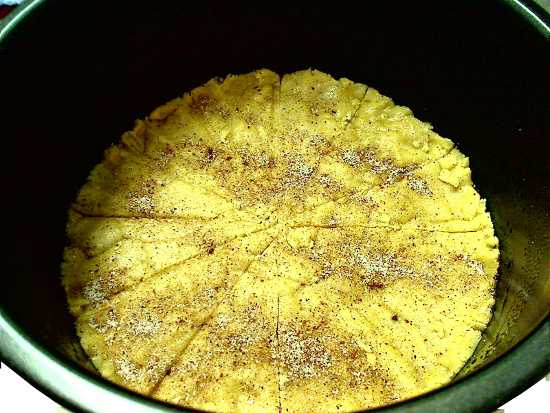
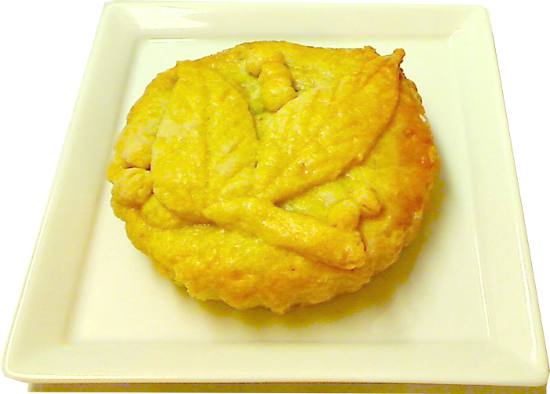
The picture above shows my first pullman-style loaf. Note the flat top due to the dough pressing against the foil. The top is a light golden brown, but the sides are an over-baked dark brown. The texture of the bread was still coarse, though more elastic than some of my earlier breads. To shave off more oven time, I cut the liquid-to-flour ratio just to the amount of water necessary to make a stiff, but kneadable dough. In breadmaking terminology, the hydration level was around 60%, which is at the low end of the range for good bread. To facilitate the release of steam in a controlled manner and further help soften the texture, I perforated the foil with a wood skewer. It was trial and error to determine the best baking time and the number of holes in the foil. I checked off the internal temperatures of the best loaves for future reference.

With these corrections implemented, the basic white loaf developed an even crust, light golden toned and thinly crispy. The interior was hearty but not dry, a fine sandwich bread. I was almost ready to post the recipe when I began reading about bread made with a water roux as a means to extend the freshness. The basic loaves I made were best eaten as soon as they were cooled and ready for slicing. One day later, the texture was distinctly less moist. Two days later, I wanted to either toast the slices or revive them by steaming.

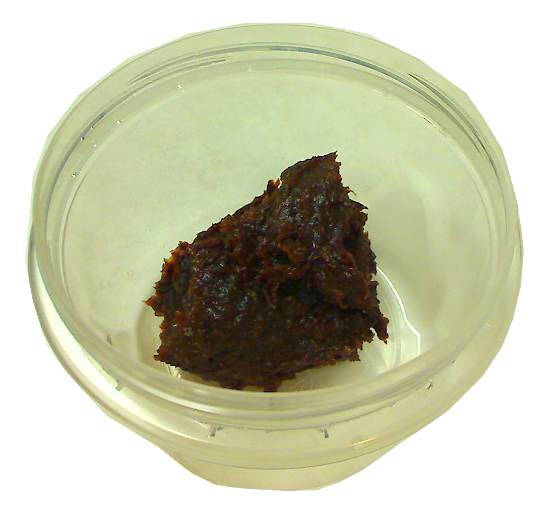
In a water roux bread, a flour-water mixture is heated until it thickens but is not fully cooked. The process binds water to the flour in a paste, which is mixed into the main dough and releases vapor very slowly during baking compared to the non-roux portions of the dough. My recipe for the roux paste was 1 part flour to 2 parts water, and the flour in the roux is borrowed from the total amount of flour for the loaf. It was trial and error to determine how much of the flour should be converted to roux. Too much roux gelatinizes the texture. Too little roux is in vain. I found that a roux comprised of 7% of the total amount of flour worked very well.


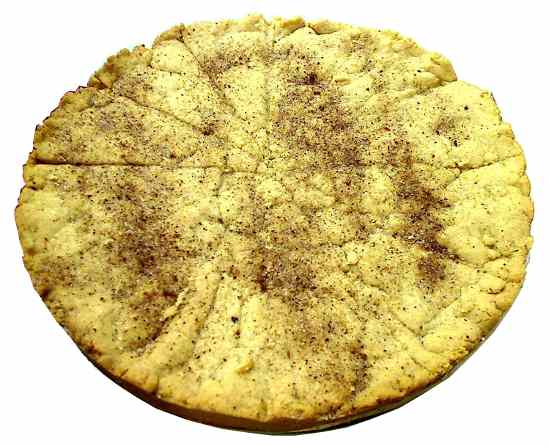
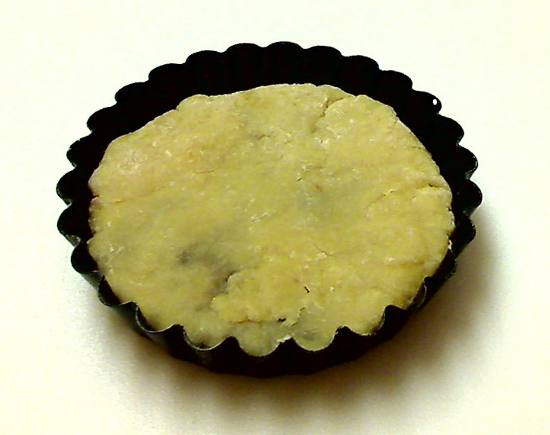
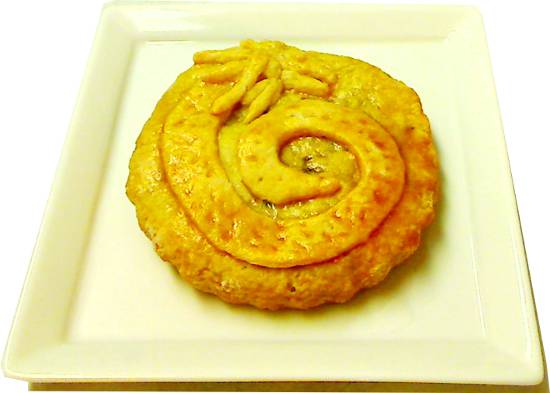
The above picture shows a loaf incorporating a water roux. The same view of a basic loaf at the beginning of this recipe highlights the less substantial crust of the roux bread. The roux crust is also not as brown, although the lighting makes that more difficult to distinguish. None of this is surprising as the water retention of the roux inhibits browning and crisping.


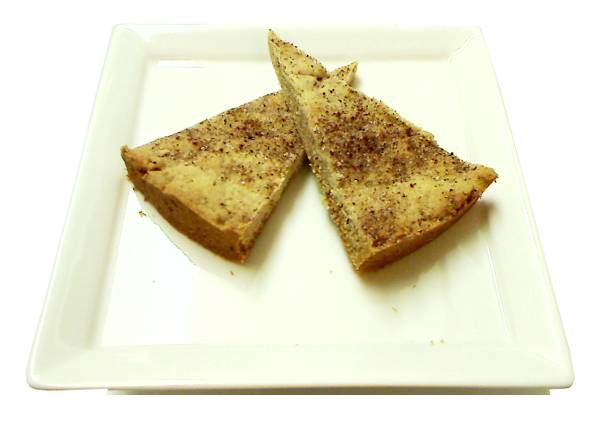
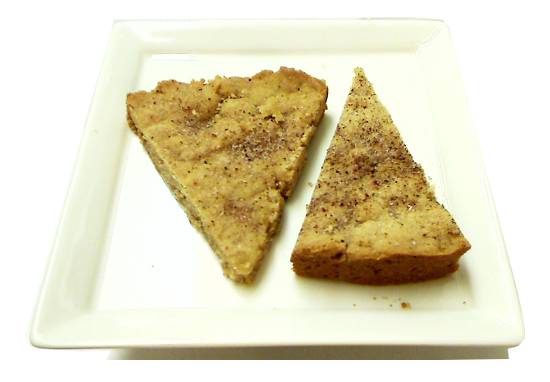
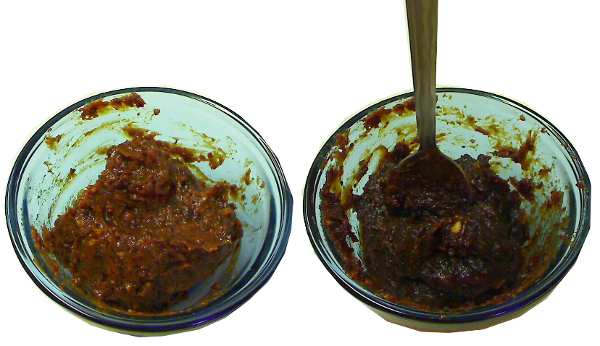
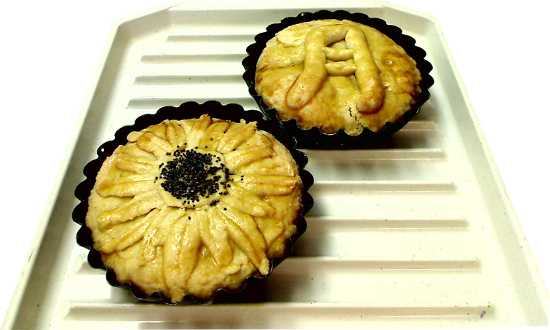
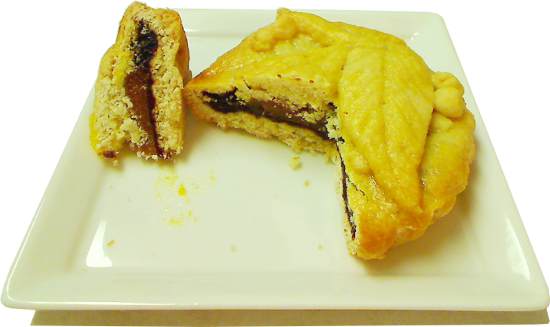
The higher moisture retention of the roux dough, however, produces a wonderfully soft bread, like a supermarket Wonder Bread, but with more body, more toothiness, more flavor and a subtle creaminess. The picture above compares slices from the two loaves. The top plate shows the basic loaf and the bottom plate is the roux bread. Note the fluffier texture and more open crumb of the roux bread.

Although the roux dough did produce a fluffier loaf, I can't really say it extended the "freshness". As with the basic loaf, the texture of the roux loaf noticeably degraded after the first day, although the former dried out faster overall. Nevertheless, for the texture alone, the roux bread is my favorite, and I don't mind the extra trouble to make it. As I said before, a little steam successfully revives both breads, so the extra effort to prepare the roux is totally worth it for me.

Because the hydration level is important, I have given weight measurements for the flour. The basic and roux breads both contain 1-3/4 cups of flour. The total weights of the flour in the 2 breads don't quite match up. Those numbers are actual amounts from particular loaves. The 0.5 oz difference is not significant in this recipe.

These breads were tested only with rapid rise yeast. Active dry yeast should work fine, but maybe not as fast. With active dry yeast, the first rise could be extended up to 24 hours. Because the dough's hydration is very low, proofing active dry yeast in the warm water first could encourage reanimation.

Makes 1 loaf
- 820 calories per loaf
- Oven Temperature: 250°F/121°C

Basic Bread:
  • 1-3/4 cup all-purpose flour (9.7 oz)
  • 3/4 cup warm water
  • 1-1/2 teaspoon sugar
  • 1/2 teaspoon salt
  • 1/8 teaspoon rapid-rise yeast (see text)
Water Roux Bread:
  • 1-5/8 cup all-purpose flour (8.5 oz)
  • 1/4 cup water roux paste (see below)
  • 1/2 cup warm water
  • 1-1/2 teaspoon sugar
  • 1/2 teaspoon salt
  • 1/8 teaspoon rapid-rise yeast (see text)
Water Roux:
  • 1/4 cup water (2.1 oz)
  • 1/8 cup all-purpose flour (0.7 oz)
Water Roux Paste Method:


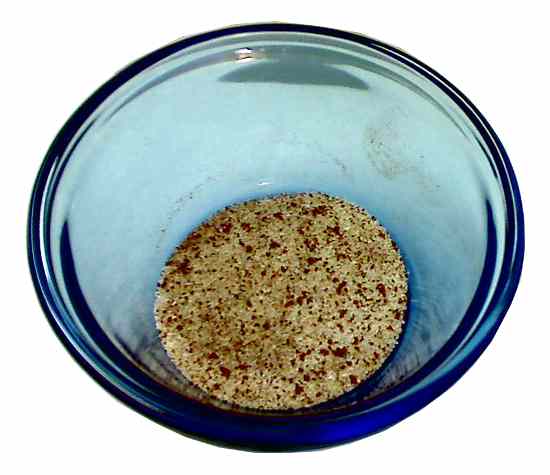
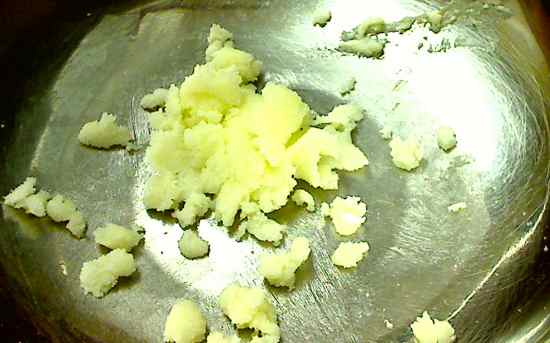
Note: the water-flour mixture must be heated until it's about the consistency of thick honey and congeals on the tines if scooped up by a fork. My thermometers were not designed to function in such a small amount of material, but I got readings between 140°F and 150°F. During the heating, small, soft lumps that form, but dissolve when whisked with a fork are fine, but if there are solid bits of cooked dough, the roux is ruined and should be started again.

Do not overcook the roux. An overcooked roux will slow or even prevent the dough from rising. With a microwave (mine is rated at 800W), set the power to MEDIUM or put a cup of water next to the water-flour mixture to absorb some of the heat power. On the stovetop, the flame should be set to low.

1. For the microwave: thoroughly mix the water and flour in a small microwave-safe bowl.

For the stovetop: thoroughly mix the water and flour in a small fry pan or saucepan.


2. In the microwave: heat the water-flour mixture for 10 to 15 seconds, remove and stir with a fork to dissolve any lumps. Repeat this step until the roux reaches the consistency of honey and congeals on the tines if scooped up with a fork (between 1 to 2 minutes total heating time in my microwave).

On the stovetop: heat the roux in a saucepan, stirring constantly. Check the consistency by taking the roux off heat and scooping it up with a fork as above.

Move the roux paste into a small bowl and let cool.

Bread Method:


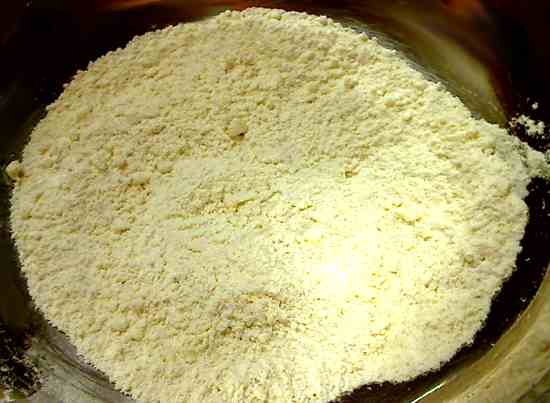
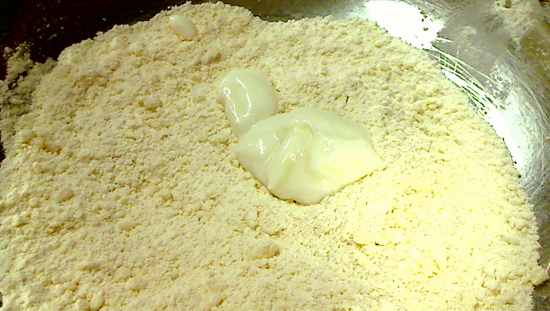
1. Mix flour, salt and yeast in a bowl until well combined. Add roux paste (for roux bread only).


2. Add half of the warm water and mix. Then add the remainder of water a little at a time to form a STIFF but kneadable dough. If the dough is too wet, knead in more flour to compensate. If the dough is too dry, add a little more water to loosen it. I almost always have some water left over: usually about 1 tablespoon left over for the roux bread and up to 2 tablespoons left over for the basic bread.


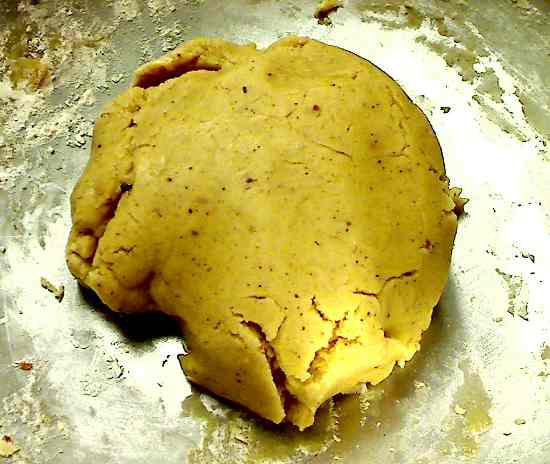
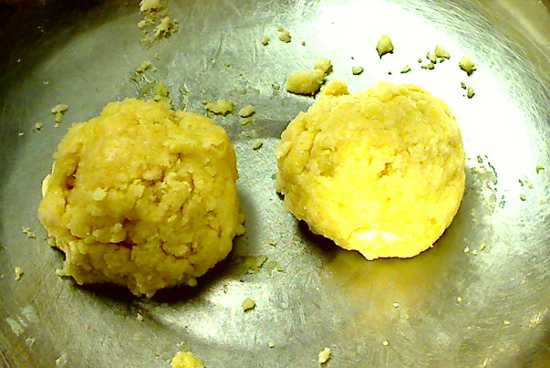
3. Knead for 3 to 5 minutes until dough is smooth and elastic. I knead with the taffy-pull method: hold the dough in both hands, stretch, fold back and repeat until the dough can stretch for about 12 inches without breaking. With larger and heavier doughs, it can be a workout, but it's fast and effective. Do NOT overknead.


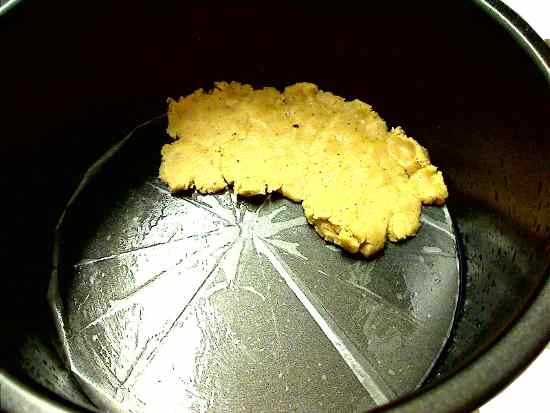
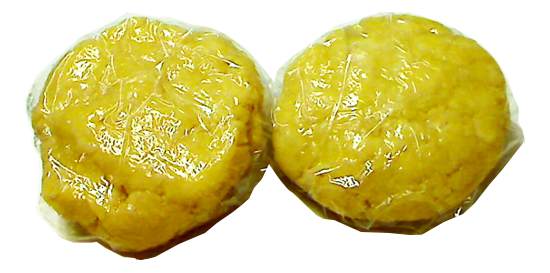
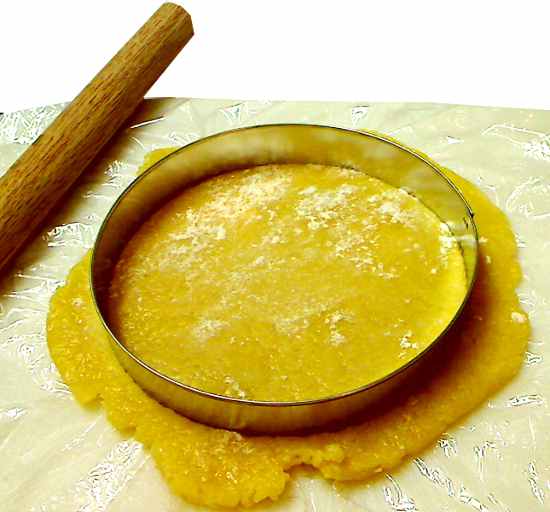
4. Put the dough back into bowl and cover. In the picture, I rise the dough in a plastic bowl with straight sides. I shaped the dough into a flat disk that fits the bottom of the bowl to make it easier to monitor the dough height.


5. Let rise in a warm place for 12 to 18 hours or until double in height. With rapid rise yeast, the double height could be reached in less than 12 hours, but I recommend continuing the ferment for at least 12 hours to develop flavor. Do not let it rise for more than 18 hours in any case, as over-fermenting may cause the dough to collapse or inhibit the second rise.


6. Grease an 8" x 4" x 2-3/8" loaf pan. Grease the shiny side of a sheet of aluminum foil large enough to cover the pan. Cover the top of the pan with the foil (the shiny side facing down) and lightly press it under the pan edge to hold it stretched in place temporarily. With a wood skewer (1/8-inch diameter), puncture the foil along the inside perimeter of the pan, the holes spaced about 1/2 to 1 inch. Then puncture the foil in 3 rows evenly spaced inside the perimeter, with the same hole spacing.


7. Shape dough into a log and place in pan. Cover and let rise in a warm place until the dough is almost to the top - about 2 to 3 hours.


8. Cover the pan with the aluminum foil, aligning the holes, stretching it taut, and pressing the foil into pan ledge to secure it. Then tightly wrap the top of the pan with twine just under the ledge and knot. Push and crimp the foil up against the twine and prevent it from slipping down.

Let dough continue rising until it presses against the foil and causes it to bulge outwards (about 1 hour).


9. Bake at 250°F/121°C for 60 minutes. To check for doneness, insert a digital probe thermometer through the foil and into the center of the loaf. If the loaf is ready, the internal temperature should be about 205°F/96°C.


10. Remove foil. Cool the loaf in the pan for about 15 minutes. Then unmold and continue cooling on a rack.

11. Slice and serve.


Thursday, September 30, 2010

Star Anise Bizcochitos


[ Equipment: oven or slow cooker. For more information about the terminology in this recipe, see Low Temperature Baking: A Journey of 3 Paths ].

A small bag of star anise pods sat in my food bin for months until I discovered bizcochitos, New Mexican shortbread cookies with anise seeds as the primary flavoring. Anise seeds and star anise are very close in taste (star anise is said to be a little more bitter), so I reckoned the substitution would be just about perfect. Plus, regular shortbread cookies bake in relatively cool ovens. Basic bizcochito recipes would need only minor tweaks to adapt them for LTB.

The origin of bizcochitos dates back hundreds of years to the early Spanish settlements in the Americas. They are a great source of cultural pride, as they are the official cookie of New Mexico. Even the spelling of the name with a "z" (bizcochitos as opposed to biscochitos) emerged from legislative debate. I can't say how well my cookies compare with authentic bizcochitos from a New Mexican bakery, but I can say they are delicious, lightly sweet and aromatic with a gentle taste of licorice and cinnamon and essence of dried grapes.

Traditional bizcochitos are made with lard, and some recipes I studied warned that cookies made with vegetable shortening would not possess authentic flavor and texture. I could not find lard at my local markets, so I had to try the shortening instead. In pastries baked a low temperatures, the taste of the shortening is not completely masked by the other ingredients. Cookies made with all butter had excellent flavor but lacked the same degree of crispness. So, I settled on a blend of half butter and half shortening (1-1/2 tablespoons each of butter and vegetable shortening to make 3 tablespoons of the blend). The recipe does list lard as an alternative, but I have never actually baked these cookies with lard at low temperatures, so I cannot vouch for the result.

The raisin water is, in my opinion, a flavor-packed alternative to the wine and/or orange juice in many bizcochito recipes. It's very easy to make. Freeze any leftover raisin water or add it to a beverage (like yummy chocolate milk). Of course, wine or orange juice can substitute for the raisin water, if desired.

Ground cloves are not a common spice in bizcochitos, but the small amount in the dough ties all the flavors together and cleans up the anise aftertaste. By comparison, the cookies without the cloves taste kind of drab. I don't recommend omitting it.

I made my own star anise powder by fine grinding whole star anise pods in a coffee or spice grinder. A small bag of the pods cost me about $1 US, which when ground into powder will fill a standard 2 oz. spice jar. If star anise isn't available, an equal amount of ground anise seed should work as well.

This is the first slow-baked cookie recipe on VaporBaker (not counting any pastries with a cookie-like shell). In normal baking, cookies require a large amount of oven real estate to spread out as they bake. My LTB ovens are converted slow cookers and would yield tiny batches of those kinds of cookies. Then one day, I saw celebrity chef Emeril Lagasse on TV demonstrating how to bake shortbread cookies in a round pan without wasting any space and obtaining a respectable yield. I immediately realized that the technique could be adapted for cramped ovens like mine.

Makes 8 or 12 cookies
- 90 (12) to 135 (8) calories per cookie
- Oven Temperature: 250°F/121°C

Cookie Dough:
  • 1 cup all-purpose flour
  • 1/4 teaspoon baking powder
  • 1/2 teaspoon ground star anise (see text)
  • 1/4 teaspoon ground cinnamon
  • 1/8 teaspoon ground cloves
  • 1/8 teaspoon lemon zest (dried or fresh)
  • pinch salt
  • 1/4 cup sugar
  • 3 tablespoons 50-50 butter-shortening blend or lard (see text)
  • 1 egg yolk
  • 1 tablespoon raisin water (see text)
Raisin Water:
  • 1-1/2 tablespoon raisins
  • 1/4 cup boiling water
Topping:
  • 1 teaspoon sugar
  • 1/8 teaspoon ground cinnamon
  • 1/8 teaspoon ground star anise
Preheat oven or cooker to 250°F/121°C.

Raisin Water Method:


1. Put raisins in a cup and cover with the boiling water. Cover and allow the raisins to reconstitute for at least 30 minutes.


2. Pour the raisins and water into a mini food processor or blender and puree (or puree with an immersion blender). Strain, pressing the pulp to extract the last drops of flavored liquid.

Cookie Method:


1. In small bowl, whisk all of the dry ingredients (except the sugar) to thoroughly combine and set aside.


2. In a large bowl, cream shortening and butter (or lard) and sugar with a fork.


3. Add egg yolk and raisin water, and beat with a whisk until light and fluffy.


4. Add flour in portions, mixing with the whisk and then a wood spoon and then kneading in the final portions of flour to form a VERY stiff dough. If the dough is too dry and won't incorporate all the flour, add drops of raisin water to soften the dough a little. Knead a few more times to form a smooth surface. Do NOT overknead.


5. Grease a 7-inch springform pan or cake pan with removable bottom. Cut out a 7-inch diameter circle from wax paper or parchment paper and place in bottom of pan. Grease the top of the paper.


6. Break off pieces of the dough, and pat them evenly onto bottom of pan.


7. In a small dish, combine ingredients for topping.


8. Sprinkle sugar mixture over the dough. Score the dough with a knife or flat-bladed dough scraper into 8 or 12 wedges. The scoring should go through the thickness of the dough. Bake for 50 to 60 minutes or until the edges are a light golden brown.

If baking in a cooker, put moisture-absorbing paper towels under the lid. When the cookies are done and if there is moisture condensation on top of the cookies (as often happens in small ovens or cookers), remove any moisture-absorbing towels and continue baking another 5 minutes or so with the cooker lid ajar to dry them off.


9. Cool and unmold. With a knife, press down into score marks on the cookies to separate them.

Below is a picture showing 2 bizcochitos: one from an 8-cut and one from a 12-cut.

Thursday, September 23, 2010

Chinese Mooncakes With Plum-Lima Bean Filling (Baked)


[ Equipment: oven or slow cooker. For more information about the terminology in this recipe, see Low Temperature Baking: A Journey of 3 Paths ].

The Chinese Moon Festival happens on September 22 this year, which means: it time for eating mooncakes! This recipe is a healthier take on the classic pastry. It begins with a filling made from dried plums and baby lima beans, replacing the traditional red bean paste which was loaded with fat and sugar. The shell is a low-fat, soft crumb version of the crispy, eggy crust of Shanghai mooncakes from Malaysia. All together, this tasty reconstruction has 1/3 the calories of the mooncakes of yore.

Many people prefer to buy mooncakes than make them under the mistaken belief that they require fancy molds and esoteric ingredients. The popular thin-skinned Cantonese mooncakes sold in the US are molded, but other styles, like the Shanghai mooncakes, are shaped by hand with varying degrees of decoration. Homemade mooncakes can be as elaborate as the baker has time to lavish on them, pleasing the eyes and palette - and the wallet, since a single mooncake can cost over $10 US, and prices are rumored to be higher this year.

This recipe doesn't jettison the original concept of mooncakes, as some of today's so-called mooncakes might be accused of doing. In the ingredients and the form are elements of the past. Although the basis of the filling is pureed dried plums, the baby lima beans give structure, cut the intense sweetness and echo the legume nature and shading of traditional red bean paste. (Prepare the beans by soaking them in water ovenight; then simmer until tender, about 40 to 50 minutes.) The 1/2 to 1 teaspoon of sugar is to taste. It acts as a preservative too, since the lima beans dilute the sugar concentration and could weaken the anti-bacterial properties inherent in the dried fruit.

The rich brown of the plum-bean paste contrasts nicely with the yellow-orange of the whole dried apricot, representing the moon (and standing in for the traditional salted egg yolk). Alternatives to dried plums include dried figs or dates. The lima beans could be replaced with another firm, mild flavor bean like mung beans or soy beans or try any bean in the cupboard. Dried nectarines, peaches or kumquats would make fine moons too, if they are small and fit inside the pastry.

I first read about Shanghai mooncakes at Corner Cafe. They originated in Malaysia, not Shanghai, by way of a similar pastry from Hong Kong. For my recipe, the biscuit crust has been modified in content and technique to reduce the fat and develop a flakier crumb. Yogurt compensates for the excised butter. It imparts richness as well as hydrates the dough. I originally substituted more beaten egg, but decided that the strong eggy flavor competed with the filling. Plain yogurt is fine, but vanilla yogurt brings a touch of smoothness.

Shanghai mooncakes have a crispy, crunchy shell, while the skin on Cantonese mooncakes is soft and chewy. In both types, the dough is kneaded to develop the gluten. In this recipe, the wet ingredients are incorporated into the dough with very little kneading or stirring to avoid developing the gluten for a tender, flaky pastry, as in a pie crust. In the alternative, for a more traditional, chewier texture, the dough could be kneaded briefly. I pressed the mooncakes into mini tart pans to flatten them into disks and flute the edges, like the scalloped sides on Cantonese mooncakes.

The decoration on top of Shanghai mooncakes can be as simple as almond slivers or pumpkin seeds arranged in an attractive pattern. However, consumers have come to associate the fine and fancy reliefs on Cantonese cakes as a measure of quality. While hand-crafted individual designs are too labor intensive for commercial sales, artisan and home bakers can let their imaginations fly. For the cakes the pictures, I cut out designs from scrap dough, embossed them with the dull back of the knife, laid the pieces out on top and varnished the surface with egg wash to glue them down. An alternative to cutting out and assembling the designs is to imprint the scrap dough with a small cookie mold or stamp it with a cookie stamp.

Makes 2 mooncakes
- 310 calories per mooncake
- Oven Temperature: 250°F/121°C

Pastry:
  • 1 tablespoon butter or vegetable shortening
  • 1/8 cup sugar
  • 1/4 teaspoon baking powder
  • 1/2 cup flour
  • pinch of salt
  • 1 tablespoon plain or vanilla yogurt (see text)
  • 1 egg beaten (see text)
Filling:
  • 12 dried plums or prunes (about 1/2 cup)
  • 1/8 cup cooked baby lima beans (see text)
  • 1/2 to 1 teaspoon sugar
  • 2 dried apricots (see text)

Filling Method (makes about 3 tablespoons):


1. Put dried plums, lima beans and sugar in a small bowl and with an immersion blender, puree to a smooth paste. Alternatively, put ingredients in mini food processor and puree to a smooth paste.


2. Transfer paste to a microwave-safe dish and heat on HIGH for 15 to 20 seconds. Remove (careful, dish may be very hot) and stir paste vigorously for about 30 seconds to release steam and cool. Put back in the microwave and repeat heat-stir process another 5 or 6 times, until mixture has darkened and stiffened to the point that an inserted spoon will remain standing.

Alternatively, transfer paste to a small nonstick fry pan and stir over low heat until mixture has darkened and stiffened to the point that an inserted spoon will remain standing.


3. Cool and store in a closed container or plastic bag. Refrigerate until ready to assemble mooncakes.

Pastry Method:

Pre-heat oven or cooker to 250°F/121°C.


1. In a bowl, cream butter and sugar with fork until well combined.


2. In a small bowl, mix flour, baking powder and salt until well combined. Cut flour mixture into butter mixture with a fork or pastry blender until mixture looks uniformly crumbly.


3. Add yogurt and gently toss in flour until yogurt is evenly distributed.


4. Add beaten egg, one teaspoon at a time, using toss, press, crumble actions until mixture just comes together and forms a dough (about 3 to 5 teaspoons). Avoid stirring or kneading the dough or the gluten will toughen the pastry (or lightly knead for a chewier texture - see discussion above).


5. Divide dough into 2 portions.


6. Shape each portion into a small disk and cover with plastic wrap (plastic wrap should be larger than 6-inches square). Refrigerate for 30 minutes.


7. Unwrap one disk, lightly dust the dough and plastic with flour, and place disk on center of plastic wrap. Place a another piece of plastic wrap over the dough and roll out a rough circle about 5-1/2 to 6 inches.


8. Remove top plastic wrap, dust with flour and press a 4-1/2 inch round cookie or biscuit cutter into dough. Peel off excess dough and save for decoration. The 4-1/2 inch dough circle could be cut out freehand with a knife too. The cookie cutter method is only a convenience.


9. Optional: place a dried apricot in the center of dough.


10. Put 1-1/2 tablespoons of filling in center of dough, covering the apricot.


11. Lift up sides of dough to wrap the filling and pinch the top closed to form a ball. If the dough is very moist and threatens to tear, slide a butter knife or a frosting spatula under the dough and gently lift up over the filling.


12. Dust the dough ball with flour and gently flatten into a disk, about 3-inches in diameter. Put the disk into a greased mini-tart pan (4-inches diameter), seam side down.


13. Press disk outward until the disk touches the sides of the pan. If there are any thin spots on the surface, cover them with thin sections of scrap dough and rub down edges. The patches don't have to be blended into the surface, because any telltale seams will be hidden by decoration.


14. With scrap dough, create a decoration on top of the mooncake. Typical mooncake images include flowers, leaves, animals, fishes, abstract patterns and chinese characters. Brush the mooncake with an egg wash made from the leftover beaten egg thinned with 1 or 2 teaspoons of water. In the above picture, the flowerhead on the daisy decoration was covered with poppy seeds for a 3-dimensional effect. The poppy seeds were sprinkled on after the egg wash so they would adhere to the surface.


15. Bake at 250°F/121°C for 60-70 minutes until golden brown. Cool for 30 minutes and unmold. Put the mooncakes on a rack and continue cooling until the bottoms of the mooncakes are dry.


16. The picture above shows the inside of a mooncake with apricot "moon". I've stored these mooncakes at room temperature for over a week. The high sugar, low moisture filling resists spoilage. However, I strongly recommend that they be stored in the refrigerator in an airtight plastic bag or container for maximum freshness.

Shown below are some more of my mooncake creations. The designs are (in order) a Chinese dragon, leaves and berries and the Chinese character for "moon".