Showing posts with label breads. Show all posts

Friday, February 4, 2011

Slow-Rise, Kneaded Parmesan Fig Focaccia (Baked)


[ Equipment: slow cooker or oven, toaster. For more information about the terminology in this recipe, see Low Temperature Baking: A Journey of 3 Paths ].

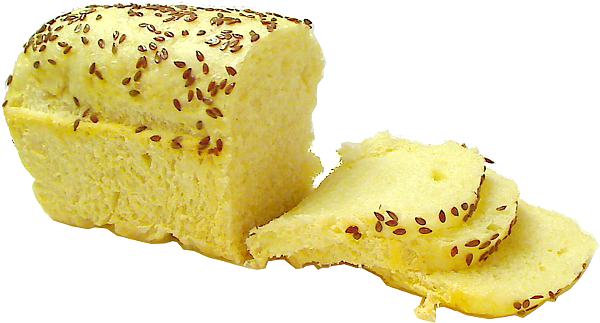
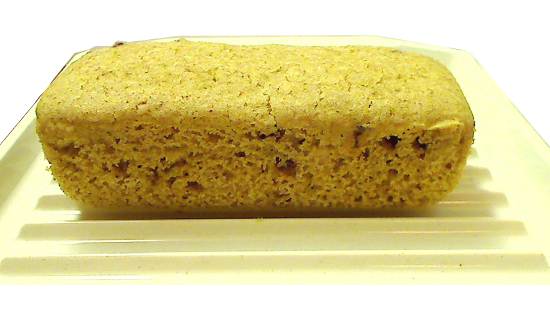
Compared to my slow-rise, no-knead focaccia, this kneaded loaf starts off with a drier, but heavier dough, enriched with olive oil and parmesan cheese. It's deliciously soft, silky and savory, but with a mellow figgy sweetness in every bite. LTB preserves the taste of the olive oil, and there is a hint of olive fruitiness throughout. This loaf is also thicker than the no-knead version - 1-1/2 inches high vs. 3/4 inch. It's best served immediately, but keeps well enough that I like to eat it without toasting for the first day or two after baking. When toasted, the bread tastes something like Cheez-It crackers.

It's the drier dough that permits the thicker bread. An identical size loaf made with a wet, slow-rise dough would bake up with a coarse texture, because LTB doesn't vaporize the moisture quickly enough. The main disadvantage is that drier doughs must be kneaded. Wet, slow-rise doughs can develop gluten during the long rise without kneading, but drier doughs may rise poorly unless the gluten is developed first. In this recipe, the presence of olive oil, basil and cheese also weigh the dough down and hamper the rise.

This recipe takes double the amount of yeast than a wet, slow-rise dough. To boost the yeast activity, I reanimated (proofed) the granules in a sugar and water solution before mixing it into the dough. The risen dough is lumpier than the steamed dough, but the lumps add character to a focaccia. As I said above, the dough must be kneaded adequately to develop the gluten for the first rise, or it'll be be too stiff for the yeast to lift up.

The olive oil and ground hard cheese seem to extend the freshness of the bread, as good as and possibly a little better job than the water roux in the White Sandwich Bread recipe, in exchange for an enriched and flavored dough. The recipe specifies 1-1/2 teaspoons of olive oil. I did try a bread with 2-1/2 teaspoons of oil (and without the cheese). As expected, it tasted very rich, yet not oily, possibly a little firmer, yet silkier.

The parmesan cheese should be finely ground to blend into the dough. With grated parmesan, the heat of LTB can leave some bits unfused in the bread. The powdered parmesan sold in supermarket aisles may best in terms of texture, but not for flavor. I purchased grated parmesan, the kind sold in pouches in the refrigerated display cases and then finely ground it in my spice grinder. The recipe adds it just before the second rise, so that the first rise puffs up without the extra weight. If it dries out the dough, I mist my hands to knead in some moisture.


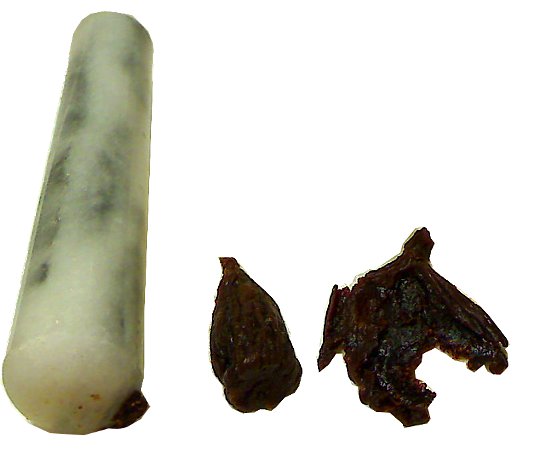
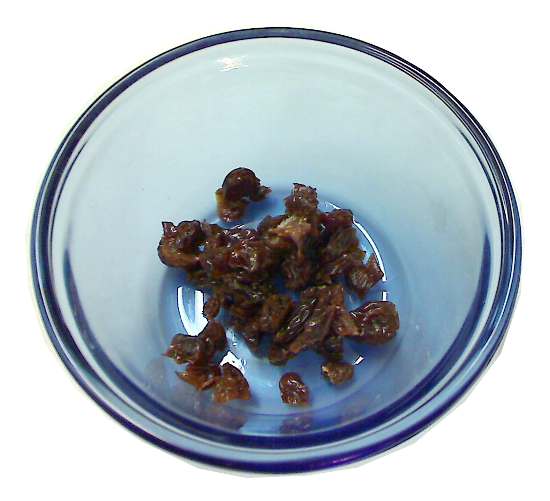
Prepare the Mission figs by first rehydrating them for 30 minutes in a bowl of hot water. Then cut the figs in quarters and flatten them to reduce their profile on top of the loaf. I flattened them with a pestle, but it's just as convenient to do it with the flat blade of a knife - the same way that garlic is flattened for mincing.


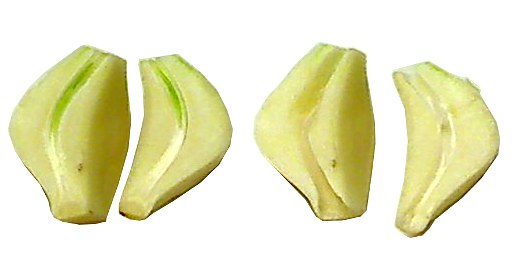
On the topic of garlic, cut out the green (sometimes light green or yellow) center shoot before mincing the clove (see the picture above). That center can taste bitter. In high temperature baking, the heat neutralizes the bitterness.

This recipe offers the option of dried or fresh basil and assumes one or the other, not both. However, each type must be prepared differently and is incorporated into the dough at different times and with different techniques. In the recipe, steps 5 to 8 show a dough containing chopped fresh basil. In the later steps, the dough contained dried basil and was topped with rehydrated dried basil. The technique for topping a loaf with rehydrated dried basil was first shown in my slow-rise, no-knead basil tomato focaccia.

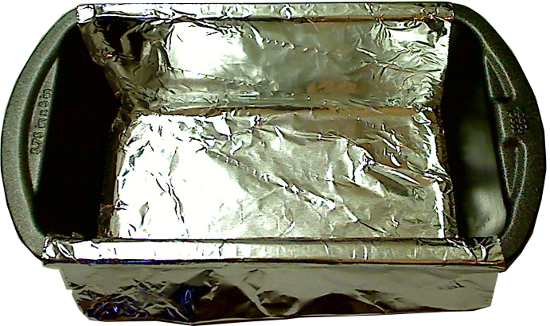
The loaf in the pictures browned very nicely at LTB temperatures. To control the evaporation of moisture and ensure even baking, the pan was covered with aluminum foil and perforated with the same ventilation pattern seen in my slow-rise, no-knead basil tomato focaccia. It's designed to slow baking at the edges and promote baking at the center. The pan must be taller than the loaf in order for steam to circulate. The pan in the pictures stands 3-inches tall, twice the height of the loaf.

Makes 6 servings
- 140 calories per serving
- Oven Temperature: 250°F/121°C

Bread:
  • 1-1/4 cup all-purpose flour (6.1 oz)
  • 2 teaspoon sugar
  • 1/2 teaspoon salt
  • 1/8 teaspoon rapid-rise yeast
  • 1/4 to 1/2 cup warm water (about 100°F/38°C)
  • 1-1/2 teaspoon extra virgin olive oil
  • 4 teaspoons fresh basil, roughly chopped or 2 teaspoons dried basil
  • 5 dried figs (rehydrated, quartered and flattened - see text)
  • 1 tablespoon finely ground parmesan cheese (see text)
  • 1 teaspoon alkalized olive oil (see text and see below)
Alkalized Olive Oil (Prepare After Second Rise):
  • 1 teaspoon extra virgin olive oil
  • 1/4 teaspoon baking soda
Alkalized Olive Oil Method:


1. Put 1 teaspoon of olive oil in a small dish. Mix with baking soda.


2. When ready, apply a thin coat with a pastry brush to the top surface of the bread.

Bread Method:


1. Combine yeast and 1/2 teaspoon of sugar in a small dish. Mix in 1/4 cup warm water and let sit in for 5 mins.


2. Whisk together the flour, salt, remaining sugar and 1 teaspoon of the dried basil (or add the chopped fresh basil in step 5) in a medium bowl until well combined. I used a 1-1/2 quart plastic container with separate lid.


3. Add olive oil and and the yeast water. With a fork, gently toss the flour and liquids (or rub them between the hands) to form a crumbly or piecemeal mixture. If the mixture begins clumping into a dough, pull the dough apart into small pieces.


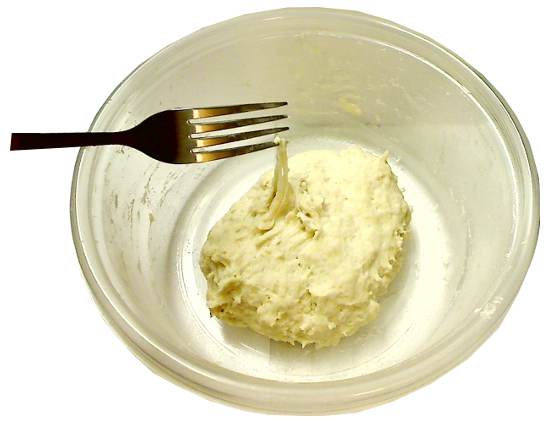
4. Mix in the remaining warm water, one tablespoon at a time, to form a moist, pliable dough (about 2 to 3 tablespoons more for 6.1 oz of flour). Knead for 3 to 5 minutes until the dough can stretch about 12 inches without breaking, but is not melt-in-the-hands gooey. When a dough goes from stiff to gooey, it's a sign of over-kneading, caused by the collapse of gluten structure. My favorite kneading technique for this amount of dough is the taffy-pull method, in which the dough is held in both hands, stretched, folded back and repeated.

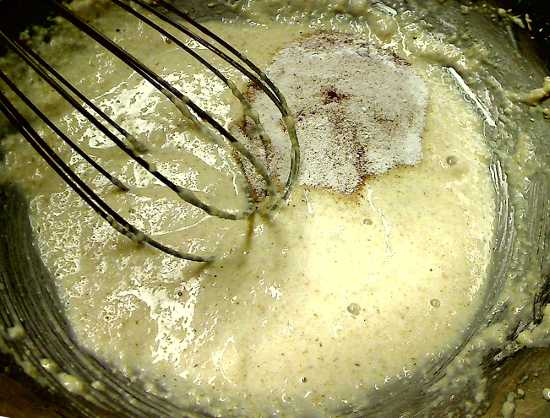
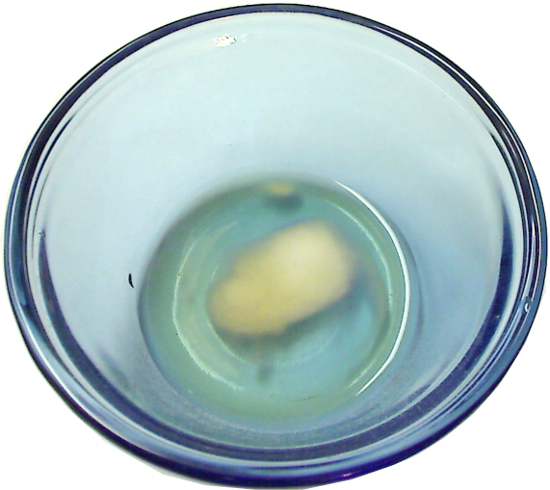
Test the dough for hydration and elasticity by slowly lifting a nub from the dough ball with a fork tine. It should stretch as shown in the picture above about an inch or more.


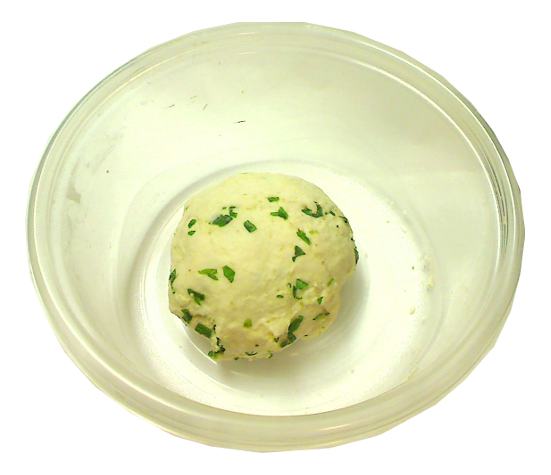
5. If using fresh basil, knead in 2 teaspoons of chopped fresh basil now. I shaped the dough into a disk for my flat-bottom container, so it's easier to check the rise height.


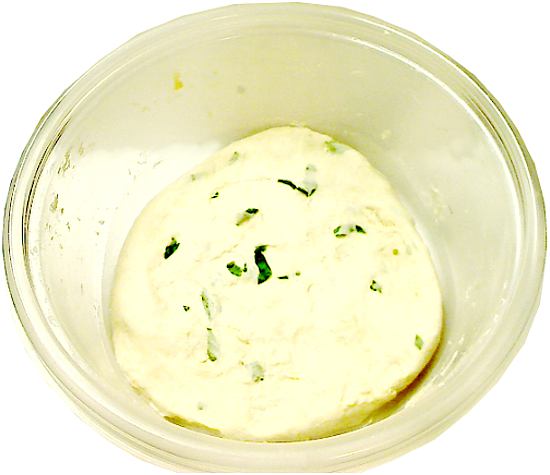
6. Cover and let rise in a warm place for 12 to 18 hrs. Doughs with rapid rise yeast will usually more than double (often more than triple) in bulk in 12 hours. Let rise for at least 12 hours to develop flavor.


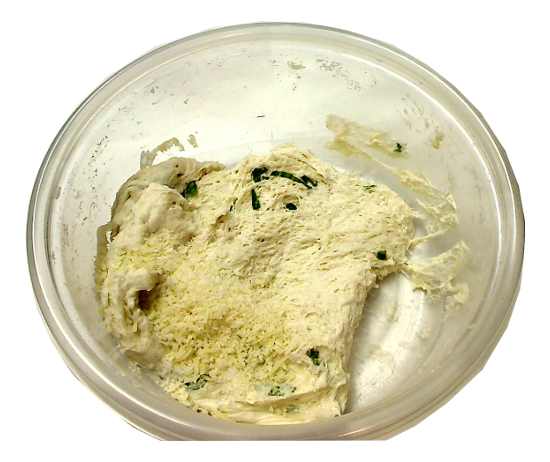
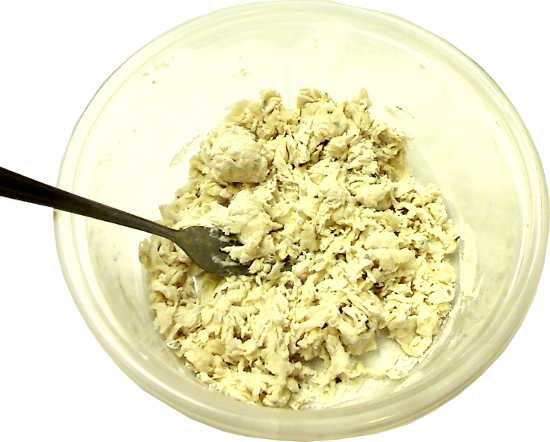
7. Gently deflate, sprinkle on the cheese and knead in. If the cheese dries out the dough, add a little moisture by wetting the hands (shake off any excess) and kneading.


8. Grease a 7-inch springform pan or cake pan with removable bottom. Shape the dough into a 5-inch disk and let rise in a warm place for 3 to 4 hrs until the loaf is about 1-1/2 inches tall.


9. Brush the top of the loaf with alkalized olive oil.


10. Sprinkle on the minced garlic and remaining fresh chopped basil. To top with dried basil, rehydrate 1 teaspoon of dried basil with 2 teaspoons of hot water, drain, pick up bits of basil with a pastry brush and splatter over the loaf. (See the slow-rise, no-knead basil tomato focaccia recipe for detailed instructions).


11. Cover the top of the loaf with the sliced (and flattened) figs.


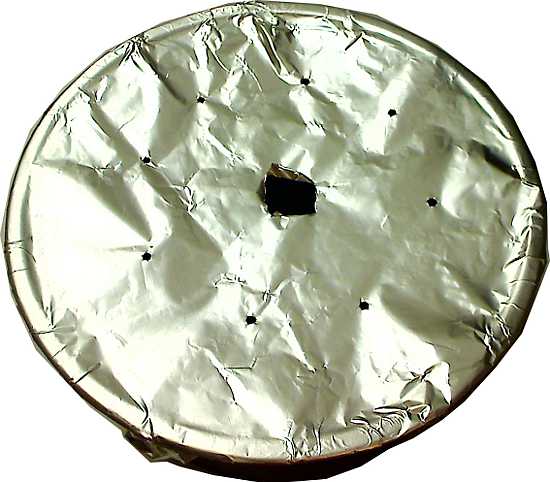
12. Cover the top of the pan with a sheet of aluminum foil and secure by tying it around the rim with string. With a knife, punch a 3/4-inch in the center of the foil. Then, with a 1/8-inch wood skewer, punch 8 holes, evenly spaced, about half way in from the rim.


13. Bake for 60 minutes. To test for doneness, insert a probe thermometer through the foil into the center of the loaf. The bread is ready if it reads around 205°F/96°C.


14. Cool for 10 minutes. Unmold. Continue cooling on a rack.


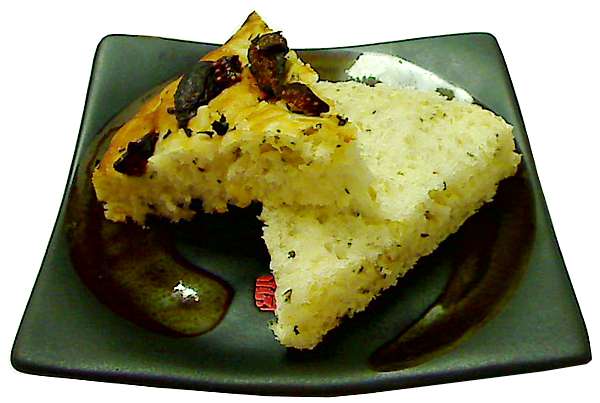
15. Slice and serve.

Double-Height Mini Potato Bread (Baked, Kneaded, Fast & Slow Rise)


[ Equipment: 5-3/4 x 3 x 2 inch loaf pan, oven or slow cooker with temperature control. For more information about the terminology in this recipe, see Low Temperature Baking: A Journey of 3 Paths ].

Revised May. 16, 2011: the recipe scaled for a large potato bread (8x4x2 loaf pan) can be found here.
Revised Mar. 21, 2011: new instructions for converting recipe to a slow-rise, kneaded bread.
Revised Feb. 8, 2011: new instructions for using potato flakes or potato flour.

It's amazing how a tiny amount of potato flour transforms a kneaded, basic white bread with a hearty richness, extended freshness (tasty without toasting a day or more later), yet minimal extra calories and minimal extra ingredients. This recipe is the same as the mini loaf white bread with a big spoonful of potato flour mixed in. Potato bread doesn't get much simpler than that. The loaf bakes up double the height of the pan with the help of a foil bonnet. It's a tall mini loaf with slices measuring on average about 3 x 3-1/2 inches - not too shabby at all. The recipe is for the fast-rise loaf, but I include instruction for converting it to a slow-rise below.

Recently, I reviewed my bread recipes and realized that all of them were slow-rise, except for that mini loaf white bread. However, that recipe required 2 stages of baking: once in a steam oven and once in a slow oven. While it was possible to revise the recipe and simplify it for an oven only, I decided to leave it intact for future reference, because there may some types of low temperature baked goods that could benefit from the combination cooking.

Instead, this recipe for potato bread is the simplification for oven only of the mini loaf white bread. As in the original recipe, an aluminum foil hood concentrates the heat in the pan, but now is perforated so that the bread essentially steams and slow-bakes at the same time. An agave glaze turns out a crust that is golden and chewy and flecked with flax seeds. It's as golden as (if not more so than) the original mini loaf, but the total baking time is cut in half!

Between potato flour and mashed potato flakes, my experience has been that dough with the flakes rises higher, but is also lumpier. I measure out 1 tablespoon of the flakes and lightly crush them in my hand before adding it to the other dry ingredients for better incorporation into the dough. For finer flakes and hence a loaf with a smoother dome top, I pulse the flakes in a spice grinder into a rough grind - one or two pulses usually suffice. However, flakes ground too fine can inhibit the rise, as can too much potato flour. For either the flakes or flour, the weight should be 0.2 oz.


The flax seeds are decoration. They do fall off if handled too much, but the agave glaze does a reasonable job of gluing them in place. A loaf could be glazed without the seeds, if desired. The glaze caramelizes into a sweet, golden crust. The picture above shows 2 loaves, the top one baked with no glaze and the bottom one coated with diluted agave syrup. The agave crust is significantly darker, thicker and a little chewier, a very nice presentation. Other kinds of glazes could substitute for the agave, including beaten egg white, diluted honey or molasses, or even a mucilaginous solution of ground flax and water, each with their own crust characteristics.

The crust on an unglazed potato loaf has less color than an unglazed white bread (no potato flour) from the same recipe, the reason being the potato flour grips moisture and inhibits browning a little. For those who find pale loaves unappealing, I recommend applying one of the glazes listed above (or any number of other glazes I haven't listed). The potato flour also increases the baking time by about 10 minutes, so a basic white bread from this recipe should be done in about 40 minutes (internal temperature 200°F/93°C or higher).

I like the spontaneity of fast-rise breads. The slow-rise breads on VaporBaker cannot be made in less than 18 hours and must be planned a day ahead. This potato loaf is risen and baked in about 4 hours (with 4 times as much yeast as a slow-rise bread). It could go faster with the addition of more yeast.


For those who'd like to convert this recipe to a slow-rise, kneaded bread (more complex flavor, sweeter, less potato-like), reduce the amount of rapid-rise yeast to 1/16 teaspoon and activate the yeast with 1/4 cup warm water and 1/2 teaspoon of sugar as shown in the Parmesan Fig Focaccia recipe. Then continue on with this recipe (add the yeast water in step 2 of the bread method). Note that a slow-rise dough will get by with less kneading than a fast-rise, because long fermentation also develops the gluten bonds.

The first rise should take from 12 to 18 hours; the second rise about 3 to 5 hours (apply the glaze - if desired - and foil bonnet about 2 hours into the second rise). The first picture above shows the first rise after 14 hours. The second picture above is the finished slow-rise potato loaf, baked without a top glaze.

A final caution: the yeast must be fresh. Stale yeast will take longer to rise or may not rise at all.

Makes 1 Demi Loaf
- 580 calories per loaf
- Oven temperature: 250°F/121°C

Bread:
  • 1-1/8 cup all-purpose flour (5.5 oz)
  • 2 teaspoons sugar
  • 1/2 teaspoon salt
  • 1/4 teaspoon rapid rise yeast
  • 1 tablespoon mashed potato flakes or 1 teaspoon potato flour (0.2 oz., see text)
  • 1/2+ cup warm water
  • 1/4 to 1/2 teaspoon flax seeds or other decorative seeds (optional)
Topping:
  • 1 teaspoon amber agave syrup
  • 1/2 teaspoon water
  • 1/2 teaspoon flax seeds
Venting Bonnet Method:


1. Tear off a sheet of aluminum foil approximately 10 x 12 inches. Center the foil, shiny side down, over a small loaf pan (5-3/4 x 3 inches) and lightly press down along the edges, creasing an outline of the top of the pan in the foil.


2. With a 1/8-inch wood skewer, punch 5 holes, evenly spaced along the lengthwise middle, leaving at least a 1/2 inch margin at the ends.


3. Remove foil from pan and set it down shiny side up.


4. Set loaf pan on the foil, the bottom centered over the 5 holes. Fold long sides of foil upward against the long sides and underneath the rim of the pan.


5. Fold the short ends of the foil upward, against the short sides and underneath rim of the pan. Press the foil all around so that it conforms to the shape of the loaf pan without any gaps.


6. Remove the loaf pan. Lightly brush the inside of the bonnet with oil. Set aside.

Bread Method:


1. Put flour, salt, sugar, yeast and potato flakes (lightly crushed - see discussion above) or potato flour into a large bowl and whisk until thoroughly combined.


2. Add 1/4 cup of warm water and toss with a fork or rub between hands to form a crumbly dough.


3. Continue adding warm water, one tablespoon at a time until it forms a sticky but kneadable dough. The exact amount of water varies with the quantity and moisture content of the flour. In my experience, it usually takes 3 to 4 tablespoons of water more to form the dough.

Knead dough to form a smooth, elastic ball - about 2 to 4 minutes for a slow-rise or 8 to 10 minutes for a fast-rise. For this amount of dough, I prefer to knead with the taffy-pull method. I hold the dough in both hands, stretch it out, fold it back - and repeat until I can pull for about a foot without the dough breaking.


4. Cover and put in a warm place (90°-100°F) to rise until double in height, about 2 to 3 hours.


5. Lightly scoop out the dough, gently and briefly knead - about 5 to 6 pull-folds with the taffy method, shape it into a rough rectangle or log and place in a small (5-3/4 inch x 3 inch) loaf pan. Cover and put in warm place to rise until the dough domes over the top of the pan, about 30 minutes to an hour.


6. In a small dish, mix the agave syrup with water to make a wash. Brush the top of the loaf with the wash. Sprinkle on the flax seeds. Brush the loaf again with the wash, making sure to wet the seeds.


7. Prepare vented foil bonnet as described above. Place bonnet over pan, seating it on the rim and crimp the foil down around the rim to secure and prevent steam leakage (except from the vent holes at the top). Continue rising for another 30 minutes to an hour. Loaf is ready to bake when the dough can be seen through the vent holes in the bonnet.


8. Bake for 45 to 50 minutes (or 35 to 40 minutes for basic white bread) in a preheated 250°F/121°C oven. To check for doneness, insert a probe thermometer through the center vent hole in the bonnet and into the bread. If the internal temperature reads around 200-205°F/93-96°C, the bread is ready.


9. Remove and cool about 20 minutes. Unmold and continue to cool bread on a rack.


10. Slice and serve.

Thursday, January 20, 2011

Harvest-Spiced Oat-Rice Soda Bread (Gluten-Free, Baked)


"Harvest spice" is my name for regular pumpkin pie spice. It can enhance a range of baked goods from muffins to breads, many without a hint of pumpkin in them, so I call it a harvest spice in reference to the fall season when pumpkins are brought to market. In this gluten-free soda bread with milk-plumped raisins, it adds a note of autumn familiarity. The bread itself is a variation of a basic gluten-free soda bread recipe I found on AllRecipes.com. The wet batter and low temperature baking created something more kin to a dessert bread. It lacks a true crust. At one time, I considered dabbing an alkaline solution on top to see if I could get it to brown (the same browning agent applied on my wet dough focaccia) but postponed that experiment for another day. Still, it's a very tasty dessert bread.

This bread was my first foray into slow baking with a flour other than wheat. The original recipe was made with rice flour and tapioca starch. However, I wanted to try grinding my own flour, and homemade rice flour famously turns out baked goods with a gritty texture if it's the main ingredient in the flour blend. Tapioca starch is still a specialty item and not sold in markets near me.

Early on, I tested soda breads with a commercial gluten-free flour: Bob's Red Mill Gluten-Free All Purpose Flour, but the taste of the flour was too distinctive, possibly because of the large proportion of beans (garbanzo and fava). From the reviews on Amazon.com, preferences for this product are highly individual. For my own flour, I went with a classic blend: oats and white rice - with a 2-to-1 emphasis on the oat flour. (For those who don't want to grind their own flour, many supermarkets sell oat flour and rice flour. Just blend them in a 2 (oats) to 1 (rice) ratio for this recipe.)

Any coffee grinder can convert the soft oats into a fine flour, but not so with raw rice. A regular blade coffee grinder smashes raw rice and other hard grains and legumes into a pebbly powder, too coarse for baking. Further, a blade grinder is inefficient as a flour mill, when large quantities of flour are required. On the other hand, burr-mill coffee grinders can work as flour mills at a fraction of the cost of a flour mill.

I purchased a Black & Decker burr-mill grinder (model CBM210) that costs a few dollars more than a regular blade grinder. The reviews on Amazon.com warned that this inexpensive machine would not produce an espresso grind (ultra-fine) consistently, and they were correct. My solution was to pass the flour through the mill several times, each pass outputting a finer, less gritty powder. Even then, the flour was never as fine as the Bob's Red Mill flour. (To improve the performance of this machine, see my Shim Mod For Black&Decker CBM210/220 Burr-Mill Grinder.)

I chose an oats-rice ratio of 2 to 1 to create a light flour. It weighs about 10% less than the same volume of the Bob's Red Mill flour. My rationale was that lighter flours rise faster and with less leavening, two important considerations in low temperature baking. I did try to grind a blend containing beans, but the flour performed inconsistently, possibly because the bean particles were too large and weighed down the batter. Perhaps I could have cycled the flour through the grinder more times to pulverize it more thoroughly. Another option was to sift out the larger flour particles with a fine sieve for reprocessing.

Initially, I made the bread without the ground flax seed. The slices were so delicate that they would crumble resting in my hand. More egg might have firmed up the bread at the risk of turning it into a cake. An alternative (and vegan) binder, flax seed has become a common ingredient in gluten free baking. My first batters with ground flax seed contained 1/4 to 1/2 teaspoon of seed - not an unusual amount of binder for the quantity of flour - and refused to rise. It seems slow ovens don't generate adequate lift from chemical leaveners to counter the gelatinizing effect of the flax.

A little ground flax seed goes a long way. I found that 1/8 teaspoon of ground flax seed balanced a firm texture with a small sacrifice in volume. In the recipe, I recommend as little as 1/16 teaspoon of flax for a fluffier loaf that still holds itself together. Ground flax seed can spoil rapidly, so I make a new batch every few months (I grind the seeds in my blade coffee grinder) and store it in a jar until I'm actually making the recipe (that is, I don't make an oat-rice-flax flour). If flax seed isn't available, try substituting with ground chia seeds or a bit of xantham gum.

Flours that aren't uniformly fine ground will produce baked goods with a gritty texture, but even commercial gluten-free flours may have a subtle grittiness inherent in the ingredients. I could, for example, detect the hint of bumpiness in breads made with the Bob's Red Mill Gluten-Free General Purpose Flour, and that product is probably as fine ground as any flour in the market. I tried soaking flours for several hours in buttermilk to soften the texture (the soaking technique allegedly helps release important nutrients trapped in foods as well), and discovered that soaking impedes the rise, because the individual grains absorb water and weigh more and because some grains turn gummy. Now, if I bake with a gritty flour, I wrap the cooled loaf in plastic and let it sit for several hours before serving. The grains will absorb moisture and soften. The rest period doesn't eliminate gritty particles, just softens them so they're less objectionable.

As with quick breads in general, work quickly and don't over-mix. There's no gluten to toughen the bread from over-mixing, but overworked batter might turn gummy and fail to rise. I mixed up some loaves with the standard puree attachment on my immersion blender in an attempt to break up any large flour particles, and the batters didn't perform well at all (little rise or no rise). Also, the baking soda begins bubbling as soon as it contacts the buttermilk. If the batter isn't baked immediately, that soda lift could be lost.

On the topic of baking soda, the standard pairing seems to be 1/2 teaspoon baking soda per cup of buttermilk. My recipe specifies twice that ratio. The amount of soda must balance the acid in the buttermilk, which may vary from brand to brand. If the bread tastes a little bitter and has a dryish, coarse texture, try reducing the soda to 1/8 teaspoon.

Makes 6 servings
- 80 calories per serving
- Oven Temperature: 250°F/121°C

Soda Bread
  • 5/8 cup 2:1 oat-rice flour, commercial or homemade (2.8 oz - see below, see text)
  • 1/4 cup cultured buttermilk
  • 1 tablespoon beaten egg
  • 2 tablespoons milk
  • 1 tablespoon sugar
  • 1/8 teaspoon salt
  • 1/4 teaspoon harvest spice blend (see below and see text)
  • 1/16 to 1/8 teaspoon ground flax seed (see text)
  • 1/4 teaspoon baking soda (see text)
  • 1-1/4 teaspoon baking powder
  • 1 tablespoon soaked, chopped raisins (see below)
Oat-Rice Flour (makes 2-1/4 cups flour)
  • 1 cup long grain white rice
  • 2 cups rolled oats
Milk Infused Raisins (makes about 1 tablespoon)
  • 1 tablespoon raisins
  • 1/4 cup hot milk
Harvest Spice Blend (makes about 1 teaspoon)
  • 1/2 teaspoon powdered cinnamon
  • 1/4 teaspoon powdered ginger
  • 1/4 teaspoon nutmeg
  • 1/8 teaspoon cloves
Oat-Rice Flour Method

Note: The oat-rice flour for this recipe consists of 2 parts oat flour to 1 part rice flour. These grinding instructions apply specifically to the Black and Decker CBM210 Burr-Mill Grinder. They may need to be modified to work with other model grinders.


1. Cover rice with water and soak for 30 minutes.


2. Drain rice, pat dry with paper towels. Spread rice on a large baking sheet over more paper towels and allow to air dry completely or place rice in a dehydration oven set to 120°F/49°C and dry for several hours (stir the rice occasionally to help release the vapor).


3. Grind rice one or more times until fine as flour. In my burr-mill machine, I grind the rice 1 time on the coarse setting and then 3 times on the finest setting.


3. Measure out 3/4 cup of rice flour and place in a large bowl. Repeat step 2 for the oats. Measure out 1-1/2 cups of oat flour and mix thoroughly with rice flour.


5. Grind oat-rice flour blend 2 to 3 times on finest setting. If a flour sieve is available, sift the flour to filter out the larger particles and regrind them.

4. Store oat-rice flour in an airtight container.

Milk-Infused Raisins Method:


1. In a small bowl, soak raisins in hot milk for about 30 minutes.


2. Drain raisins and chop.

Soda Bread Method:


1. In a small cup, mix the sugar, salt, harvest spice blend, ground flax seed. Set aside.


2. Cut a strip of aluminum foil 6 inches wide and at least 11 inches long. Press the foil into a small loaf pan (5-3/4 x 3 x 2 inches) to cover the bottom and the long sides. Grease the foil and exposed sides of pan. Set aside.


3. In a medium bowl, mix the oat-rice flour, buttermilk, milk and beaten egg.


4. Pour in the sugar mixture and quickly whisk until combined.


5. Add baking soda and baking powder and quickly whisk until combined.


4. Stir in chopped raisins.


6. Pour batter into the loaf pan.


7. Grease the shiny side of a piece of aluminum foil about 9 x 6 inches. Cover pan with the foil (shiny side down) and crimp it securely down on and under the rim. With a 1/8-inch thick skewer, punch 5 ventilation holes along the center line, spaced about 1 inch apart.


8. Bake for 35 to 40 minutes. One way to test for readiness is to stick a toothpick into the loaf through the center ventilation hole. If it comes out clean, the bread is ready.


9. Cool for 10 minutes in the pan. Then loosen the loaf by sliding a knife along the two ends of the pan. Grasp the flaps of the foil liner and slowly pull up to lift the bread out. Remove the foil liner and continue cooling on a rack.


10. Slice and serve. Store the bread wrapped in the refrigerator (the milk-infused raisins will spoil at room temperature). If the bread has a gritty texture, allow the grains to soften by refrigerating the loaf for several hours or overnight. Reheat before serving.