Showing posts with label equipment. Show all posts

Thursday, September 23, 2010

Crochet A Slow Cooker Draft Stop


When a recipe instructs to preheat the oven to 250°F/121°C and the oven is an unadorned slow cooker or worse, a slow cooker with a thermometer probe going under the lid, several hours could pass before it's ready. One reason it takes so long is the heat leaking from the lid, which lacks the insulating layers of the rest of the cooker and sits loosely on the crock rim. A thermometer probe props the lid open and accelerates the heat loss. The age-old solution has been to pile layers of towels over the lid. However, the added weight could crush a probe's cord or damage the probe itself, never mind the precariousness of the unsightly linen pile in the kitchen.


An alternative to the heavy stack of towels is a draft stop. A draft stop for a door closes off the gap between the door and the floor to block the air flow. This crocheted slow-cooker draft stop has a similar function. It's shaped like an open crown hat. The opening is stuffed with a dish towel to seal the gap between the lid and crock and to add a layer of insulation over the lid. It features a ribbed band that will stretch to fit cookers from 36 to 40 inches in diameter, the sizes of my 5-quart round and 5.5-quart oval cookers. The draft stop is crocheted with 100% cotton 4-ply yarn, which is machine-washable and dryable. The specified crochet needle is 4 sizes smaller than recommended for the yarn to produce a thick, insulating fabric.

Although the draft stop by itself will help retain heat, a dish towel insert greatly improves the performance. For those who'd like to made this an all-crochet project, the dish towel could be crocheted too. At one point, I considered crocheting circular and oval towel inserts (possibly in a larger, lighter-weight gauge) for my respective cookers. I would always opt for the 2-piece draft-stop plus towel insert, as opposed to a single-piece closed-crown design. The towel insert can be lifted out to peer into the crock, so the 2-piece draft stop doesn't interfere with the functionality of that glass lid as a one-piece might.

Fast crocheters could complete this project in a day. If I were to do it again, I'd widen the ribbed band by another 4 stitches or so for a more secure fit over my oval cooker. No other complaints though, as the draft stop is in constant rotation between my two large cookers. The pattern includes instructions for modifying the draft stop for other cooker models. It could easily be expanded to a full-size slow cooker cozy that would increase the energy efficiency of the cooker for baking and keep foods warmer when the cooker is unplugged. The challenge would be to crochet openings for the cooker's handles and heat selector knob or digital control panel - not difficult to do with a bit of thought.

Note: this pattern is very forgiving. Test fit the draft stop at each stage. A dropped stitch here or there should not mar the outcome.

Gauge: 5 sc sts per inch and 6 sc rows per inch

Materials:
  • 2 skeins Sugar'n Cream 100% cotton yarn (3oz/80gr and 150yds/138m)
  • 1 crochet hook (size D/3.25mm)
  • 1 lightweight dish towel, a few inches larger than diameter of slow cooker
Abbreviations:
  • ch : chain
  • sc : single crochet
  • slst : slip stitch
  • dec : decrease stitch
  • p/u : pick up
  • x : times (eg, 3x = 3 times)


A. The Elastic Side Band or Crown

The ribbed band is about 2 inches wide. For a wider band, increase the number of stitches in the foundation chain. Row 2 onwards is done in ribbing stitch. The length of my band was about 43 inches or 86 rows.

Foundation: ch 13.
Row 1: sc in 2nd ch from hook, sc to end, ch 1, turn (12 sts, excluding last ch 1).
Row 2: sc to end, back of loops only, ch 1, turn.
Row 3+: repeat row 2 until desired length, ending on an even row.


Finish band: holding ends together, right side out, sl st ends together to form band, ch 1.


B. Curving the Crown Inward


Although the draft stop is shaped like an open crown hat, a few inches of a top (a.k.a. the "tip" in millinery terms) is crocheted, like a flap, extending far enough to cover the rim of the cooker's lid. In this section, the foundation for the top is attached to the crown and then is built up leaning perpendicular to the crown.

After the ch 1 in the Finish band row, begin by picking up stitches along the top edge of the band. I did this at a rate of about 6 stitches per inch of ribbing for a total of 254 stitches. The exact number isn't critical. A 1 or 2 stitch difference won't affect the finished project, but a drastic difference could. Too few stitches and the band won't fit over the cooker. Too many stitches and the fit will be too loose. I had to re-do the pick-up row several times to get an even distribution of stitches.

Once the pick-up is done, decrease stitches in successive rows to curve the crown inward and form the foundation for the top of the draft stop. The curve has to turn sharply inward or the draft stop won't cover the cooker's lid adequately. There are many ways to choose the number of stitches to decrease. Here's how I did it.

To keep it simple, I decrease the same number of stitches each row. By trial and error, I chose a number that is 14% of the number of stitches picked up along the band's edge. That is, for 254 stitches, the number of decrease stitches per row is 36.

Foundation: p/u sc sts along edge of band (254 sts or approx. 6 sts per inch), slst join and ch 1.
Row 1: (sc 5, dec 1) 36x, sc to end, slst join, ch 1. (218 sts remaining)
Row 2: (dec 1, sc 4)36x, sc to end, slst join, ch 1. (182 sts remaining)
Row 3: (sc 3, dec 1)36x, sc to end, slst join, ch 1. (146 sts remaining)
Row 4: (sc 1) around, slst join, ch 1. (This is the last bending row.)


C. Build The Top Flap

The final rows further develop the top of the draft stop. Unlike the previous section, the goal here is to crochet a flat disk growing inward. I figured out the rate of stitch decrease with some math to narrow the range and then by trial and error. The repeating pattern is one row of stitch decreases followed by one row of straight single crochet.

[Row numbers continued from section B]

Row 5: (sc18, dec 1) 7x, sc to end. (139 sts remaining)
Row 6: sc to end.
Row 7: (dec1, sc17) 7x, sc to end. (132 sts remaining)
Row 8: sc to end.

Bind off.


D. How To Use The Draft Stop


The two pictures above show my 5.5-quart oval cooker. In the second one, the draft stop is slipped over the top of the cooker without a towel insert. It's important to press the top of the draft stop down over the lid, so that it impedes as much heat loss as possible. Although the draft stop doesn't lie completely flat against the lid, in my tests, it reduced the preheat time by up to 20 minutes.

Inserting a small dish towel into the opening the draft stop (and spreading it out over the lid) reduced the preheat time by another 10 minutes - a total reduction of 30 minutes (or 30% of the regular preheat time).

The following 3 pictures show my 5-quart round cooker with a remote thermometer probe going under the lid. The probe's cord and the wire hook that latches the probe in place prop the lid up and prevent it from seating properly. Without a draft stop, pre-heating this cooker setup would take a very long time. In this procedure, a dish towel is laid over the cooker first and the draft stop over that. Either way is effective, but the latter ensures that the gap created by the thermometer's cord and wire are completely covered before the draft stop clamps the towel down.


Monday, July 12, 2010

How To Make And Use A Slow Cooker Temperature Control


An add-on slow cooker temperature control for less than $10? That's the cost in parts, because it's a do-it-yourself project, a re-purposed light dimmer I discovered at The Frugal Filmmaker site. This article is about how I built it and how I reworked it as a slow cooker temperature control.

To someone who does a lot of LTB in a slow-cooker oven (as I do), the most important accessory after a nice set of analog and digital thermometers is an external temperature control for fine tuning the amount of heat inside the cooker. Most slow cookers have only 3 built-in heat settings: warm, low and high, which can be switched in some sequence to maintain a target temperature. Although I prefer slow cookers as my LTB oven (it's more versatile and has a smaller carbon footprint than an oven or a toaster oven), all that switching to steady the temperature can be exasperating.

In LTB, a relatively stable oven temperature is important to minimize the formation of acrylamides and other toxic compounds in baked foods as well as for testing recipes. Beyond baking, a precise, steady heat control is mandatory when the slow cooker operates as a food dehydrator or a yogurt incubator or a sous vide water oven. Home cooks experimenting with sous-vide techniques pioneered rigging a slow cooker as a water oven by plugging it into a light dimmer to fine-adjust the amount of electrical current flowing in the cooker's heating coil, and hence fine-adjust the temperature inside the crock.

THERMOSTATS VS. DIMMERS

There are two types of add-on temperature controls for slow cookers: thermostats and dimmers. Dimmers are the same thing as ordinary household light dimmers except that a slow cooker replaces the light bulb. Turning the dimmer's knob (or moving a slide) varies brightness in lighting or heat in a cooker. At a stable temperature, the heat going into the cooker is balanced with the heat being dissipated through the lid and the crock. Because dimmers don't have the ability to measure temperature, the temperature inside the cooker can drift (the dimmer has to be adjusted periodically), but the heat is relatively steady and continuous.

Thermostats, like the SousVideMagic from Fresh Meals Solutions and the Cooking Controllers from Aubrey Instruments, are basically dimmers with a thermometer probe to read and automatically regulate the cooker's temperature. The user plugs the cooker into the thermostat, enters the target temperature, hangs the thermometer probe in the crock and the thermostat takes care of the rest. Thermostats regulate heat by cycling the cooker on and off. A thermostat maintains an AVERAGE set temperature; the actual temperature can range above and below the target temperature.

Thermostats can cost 5 times as much as the cooker itself, and at that level of investment, I would seriously consider purchasing a high-end countertop oven with an accurate internal thermostat. Ovens heat faster (and consumer more power), although a slow cooker is still more versatile (those ovens can't do sous-vide cooking, for example).

Commercially-made inline lamp dimmers and dimmer boxes (sold in lighting and home improvement stores) can function as temperature controls, if they are rated to handle AT LEAST the amount of power the cooker will draw. A lot of those desk lamp slide-type dimmers, for example, are rated for 300W. Since the average large slow cooker is rated just under 300W, those dimmers are not recommended for large cookers, because the safety margin is non-existent. Plus, the travel on slide adjusters can be as little as 1 inch, so fine adjustments are difficult or impossible. A homemade dimmer box, on the other hand, can be assembled with more robust parts and at less cost.

DIMMER BOX PROJECT


A search online pulled up several light dimmer projects, but the Frugal Filmmaker's inline dimmer switch was the cheapest and didn't compromise quality. It costs less than $8 US to build (2010 prices), and ALL the parts can be sourced from a Home Depot store (there's a Home Depot a few blocks from where I live). Other home improvement stores with an electrical section should have the identical or similar parts. It's so easy to build that the author (Scott Eggleston) has posted a YouTube video of how to do it here. The dimmer box is rated for 600W (excellent safety margin with most slow cookers) and is very rugged.

[caption id="attachment_731" align="aligncenter" width="341" caption="Heat Selectors On Manually-Operated Slow Cookers"][/caption]

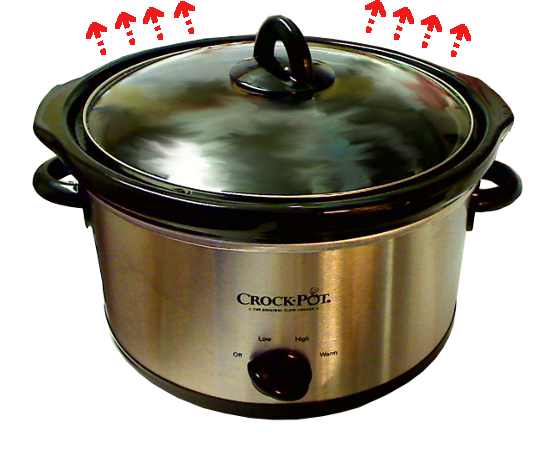
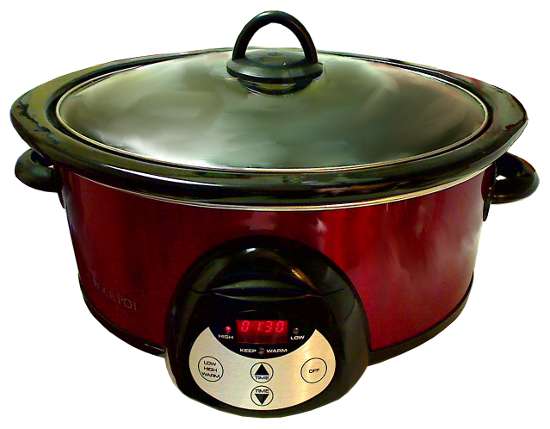
[caption id="attachment_732" align="aligncenter" width="350" caption="Automated Cookers Are Incompatible With Dimmers And Thermostats"][/caption]

Caveat: Dimmers and thermostats are compatible ONLY with manually-operated slow cookers. They will not work with (and may damage) slow cookers with automatic features like timers, programming and preset cooking sequences. Manual slow cookers have just one control, a rotary switch with 3 or 4 settings: OFF, WARM, LOW and HIGH. They don't have even a power indicator light and usually don't have a separate on/off switch.

For detailed plans of the dimmer control, see the Frugal Filmmaker's project page, his instructable and video linked above. This article supplements those guides with information about constructing the dimmer as a temperature control. My pictures below record how I assembled and tested the dimmer and how I incorporated it into my slow-cooker-based baking station.

TIPS AND PICTORIAL GUIDE TO BUILDING, TESTING & USING A TEMPERATURE CONTROL


1. Putting It Together:

Warning: Anyone who is uncomfortable or unfamiliar with electrical safety should ask a knowledgeable person for help or buy a pre-built dimmer.

[caption id="attachment_771" align="aligncenter" width="532" caption="Examples Of Electrical Labels With Power Consumption Numbers"][/caption]

1. This dimmer box is mounted "inline" box on an electrical extension cord. I bought a generic "light duty" extension cord rated at 120VAC and 13 Amps, so it can handle a power transfer of over 1000 watts, more than three times the power consumption of an average slow cooker. To be safe, check the cooker's electrical label near the attachment point of its AC cord.

[caption id="attachment_775" align="aligncenter" width="577" caption="Dimmer Box Wiring Diagram"][/caption]

The wiring diagram above shows how the dimmer box is embedded along an AC extension cord. When dividing the extension cord, I paid attention to the length of the cord with the plug. My complete slow-cooker oven setup is a jumble of wires and a long cord would only contribute to the mess. I cut the cord so that it it can reach the AC outlet on the kitchen wall with the dimmer box sitting on the counter next to the cooker. If I were to move the dimmer box for another purpose (for example, to dim a lamp) not convenient to an AC outlet, I'd plug it into a power strip or another extension cord.

[caption id="attachment_697" align="aligncenter" width="550" caption="Marking The Neutral (Ribbed) Side Of The Cords"][/caption]

This dimmer box is wired for 2-prong plugs (there are 3-prong dimmer projects on the net, although this dimmer box could be modified for 3-prong plugs too). All slow cookers I've owned have 2-prong plugs. The polarity on the extension cord MUST be preserved during wiring. After the extension cord is divided into male and female sections, examine the insulation along the cord of both sections. Each cord will have a smooth side and and a ribbed side. The ribbed side is the "neutral" wire. Mark the ribbed side below the exposed wire on both sections for easy identification later.

[caption id="attachment_698" align="aligncenter" width="550" caption="Popping The Cutout At The Top Of The Work Box"][/caption]

2. The cutout at the top of the work box popped off by tapping it with a nail and hammer.

[caption id="attachment_700" align="aligncenter" width="550" caption="Strain Relief Knot"][/caption]

3. I made the strain relief by holding the ends of both cords together and knotting them in one big knot.

[caption id="attachment_766" align="aligncenter" width="550" caption="Connect Neutral (Ribbed) Wires"][/caption]

4. Twist the stripped neutral wires together and cap them with a twist connector. The connector must be twisted firmly over the wires so that it won't come loose. Three orange twist connectors are included in the rotary dimmer package.

[caption id="attachment_702" align="aligncenter" width="550" caption="Dimmer's Green Ground Wire Rolled Up And Away"][/caption]

5. The instructable doesn't list a specific rotary dimmer model. Home Depot sells more than one brand. I chose a Levitron 6681 600 watt dimmer. Other brands should have similar wiring schemes.

After snipping off the exposed part of the green ground wire on the rotary dimmer, roll it up out of the way.

[caption id="attachment_710" align="aligncenter" width="550" caption="Dimmer Wiring Finished"][/caption]

6. Connect each black wire from the rotary dimmer to one of the remaining white wires and cap them with twist connectors. It doesn't matter which black wire goes to which white wire. The connectors must be twisted firmly over the wires, so that they don't come loose.

[caption id="attachment_703" align="aligncenter" width="550" caption="Dimmer Set Into Work Box"][/caption]

7. Carefully push the rotary dimmer into the work box and align the screw holes at the top and bottom. Install screws (included in the rotary dimmer package) to hold the dimmer in the work box.

[caption id="attachment_704" align="aligncenter" width="550" caption="Faceplate Attached"][/caption]

8. Position the faceplate over the work box so that the shaft of the dimmer goes through the faceplace's rectangular opening and align the screw holes. Install screws (included with the faceplate) to secure the faceplate.

[caption id="attachment_705" align="aligncenter" width="550" caption="Knob With Indicator Line Drawn In"][/caption]

9. Press one of the knobs (the dimmer comes with a choice of 2 knobs) on the dimmer's shaft. Turn the knob all the way to the left to the minimum position. Draw an indicator line on the side of the knob. The indicator line will help mark the knob settings later when the control is calibrated.

[caption id="attachment_706" align="aligncenter" width="550" caption="Parts To Test Dimmer Box"][/caption]

10. To test the dimmer box, plug a lamp with an incandescent bulb (or a dimmable florescent bulb) in to one of the dimmer's receptacles. If such a lamp isn't available, make a test lamp with an incandescent bulb and a 2-prong bulb adapter. These parts are inexpensive. A box of 4 100W incandescent bulbs cost me about $1.20 and the bulb adapter was $2.00. Both are found in the electrical section of Home Depot.

[caption id="attachment_708" align="aligncenter" width="550" caption="Dimmer Box Controls The Light Bulb"][/caption]

11. For testing, the dimmer's AC plug should be plugged into a power strip with a circuit breaker. Press the dimmer knob down to activate (if the light's not already on). Turn the dimmer knob to the right, and the light intensity should increase. Turn the knob to the left and the light intensity should decrease. End of test.

2. Calibrating The Temperature Control

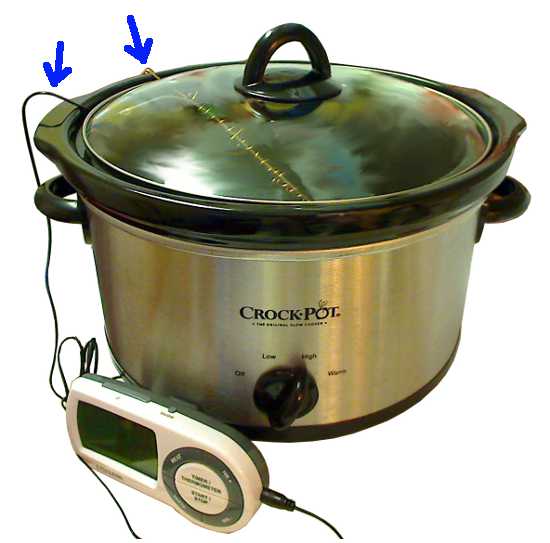
[caption id="attachment_765" align="aligncenter" width="600" caption="Large Slow Cooker With Temperature Control And Probe Thermometer"][/caption]

To calibrate the temperature control is to ascertain the knob setting(s) that will produce a stable temperature inside the crock. In the picture above is my full LTB oven set up: slow cooker, dimmer temperature control and a remote probe digital thermometer to monitor the temperature inside the crock. In lieu of a digital thermometer, if the crock has room and if the lid is transparent, a simple analog oven thermometer would be as suitable (see Low Temperature Baking: A Journey Of Three Paths).

Aside: all this may seem like a lot of equipment, but together it cost me about $50 US, and the system can operate as an LTB oven, a sous-vide oven, a dehydrator, a plain slow cooker. Not shown in the pictures is a small appliance timer I bought from Home Depot for $4, so the system can be programmed to turn on and off at specified times.

[caption id="attachment_786" align="aligncenter" width="544" caption="Diagram Of LTB Oven System"][/caption]

The diagram above clarifies the connection of the temperature control. Before powering the system for the first time, I recommend that the temperature control be plugged into a power strip with its own circuit breaker, as a safety precaution. The relationship between the knob settings and crock temperature isn't linear, so it's important to determine the settings for temperatures frequently cited in recipes. That said, the actual temperature inside a crock may change day to day or hour to hour due to ambient room temperatures and food load, regardless of the settings. However, a ceramic crock is very good at holding steady heat, so once stabilized for the food being baked, it should stay close to temperature for the full baking cycle.

[caption id="attachment_780" align="aligncenter" width="550" caption="DIY Heat Protection Coils For The Thermometer Probe"][/caption]

[caption id="attachment_796" align="aligncenter" width="550" caption="Thermometer Probe Hooked To Crock"][/caption]

If the thermometer is a digital remote probe thermometer, the probe should be protected from hot spots inside the crock by sheathing it in a wire coil. The first picture above shows 2 coils I made from 16-gauge brass craft wire. The long one protects the full length of the probe in large cookers. The small one is for my 1.5-quart cooker. In the second picture, the probe is hooked to the crock so it doesn't fall. I made the hook from the same brass craft wire as the heat coil. The hook is positioned as close to the probe's cable as possible, so that it props the lid from crimping the cable.

Do NOT make the coils by wrapping wire around the probe itself. The probes are delicate and easily damaged. A wooden dowel or metal rod of similar diameter would be good former. I didn't have a former and wrapped the coil free form with mini pliers. The coil should be longer than the probe, so that the probe's tip never touches the bottom of the crock, and should fit loosely, so that the probe never touches the sides of the crock. On the large coil, spaced every 2 inches or so, I wrapped one large round, about 3/4-inch in diameter, to further cushion it from the crock.

On my controller, I have marked settings for 250°F, 225°F, 140°F and 100°F. 250°F is the top baking temperature in VaporBaker recipes (foods may be exposed to higher temperatures only briefly). 225°F is for baking without (or very little) browning. 140°F is the maximum temperature for dehydrating foods inside the crock (beef jerky must be pasturized at 160°F to kill bacteria before drying) and 100°F is for rising bread dough.

I started with the setting for 250°F and worked my way down. Here's the process to calibrate the temperature control for an LTB oven, which can take several hours to complete, if the cooker heats up very leisurely. If the system will be a sous-vide oven, then crock should be filled to the desired level with cold water before calibration.

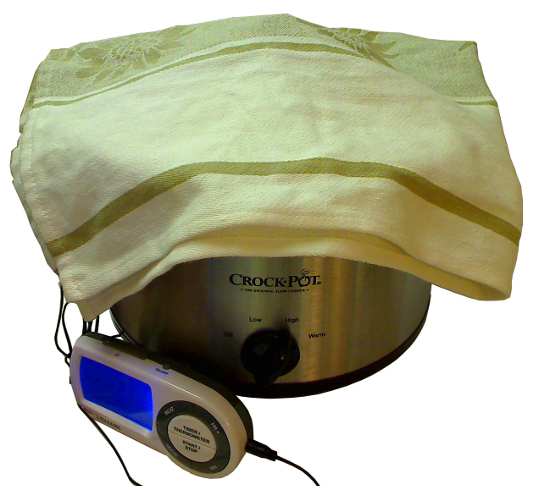
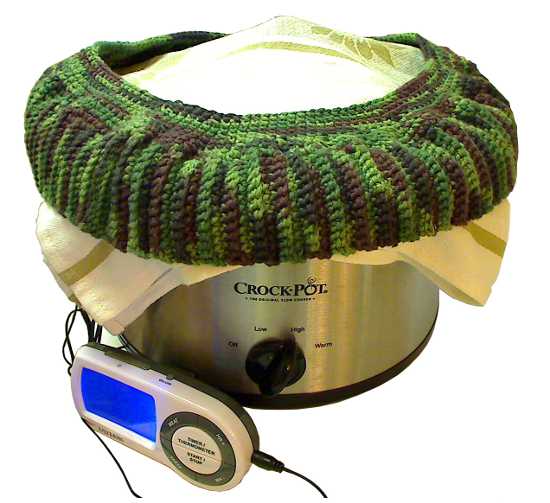
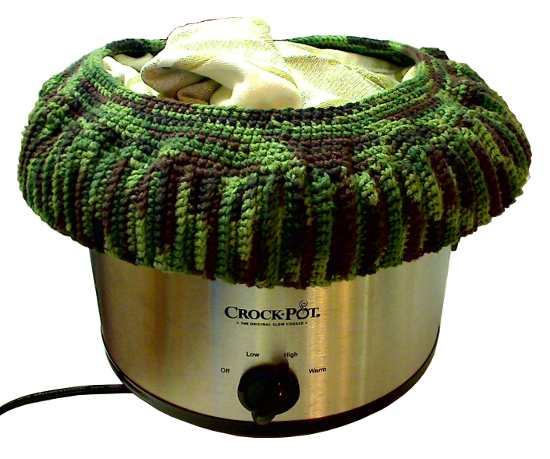
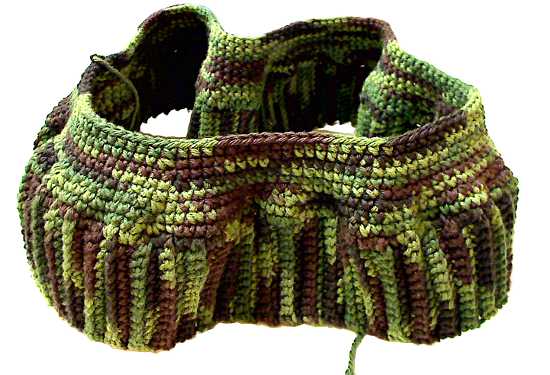
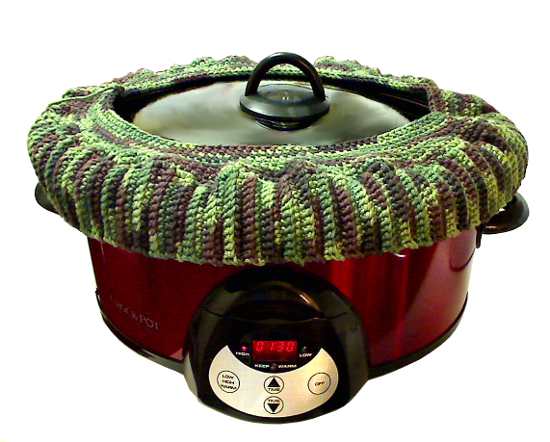
1. Turn the slow cooker heat selector to HIGH. The crock should be empty, except for a thermometer or thermometer probe. Place one or two dish towels over the lid to block heat loss, especially at any point where a thermometer cable exits the crock. For an alternative to layers of towels, try this crocheted draft stop. It has good insulating properties, applies very little pressure to the lid and won't damage the thermometer probe or cable.

2. Turn the temperature control on and set the knob to maximum current (full clockwise). The rotary dimmer in my box has a push-on/push-off switch, and it's impossible to tell visually whether it's on or off. I wait a minute and touch the side of the cooker. If I feel warmth, then it's on.

3. Let the cooker to heat up to about 240°F. My large cookers need about 40 minutes to get this hot. Turn the temperature control knob back to the middle position and wait about 15 minutes. If the temperature climbs beyond 250°F, turn the knob down (counter-clockwise) a little. If the temperature doesn't reach 250°F or falls, then turn the knob up. Continue adjusting the temperature until it stabilizes at 250°F (or within a degree of it). Mark the knob setting on the faceplate.

4. Repeat step 3 for the other target temperatures, going from the highest to lowest.

Note: If the temperature control will be swapped out to other slow cookers, it must be re-calibrated for each cooker.

3. Baking In A Slow Cooker With A Temperature Control

The temperature control calibrations are only approximations. The crock temperature will factor in the ambient room temperature and the type and quantity of food being baked. In my experience, the calibration marks are very good approximations, under a variety of conditions.

1. Turn on the system with the slow cooker heat selector set to HIGH and the temperature control set to maximum (full clockwise). Place rolled up dish towels or a draft stop around the lid to block any heat leakage, paying careful attention to any gap created by the presence of a thermometer probe.

2. If the recipe must be baked as soon as it's prepared, then wait until the pre-heating is almost finished before proceeding.

3. Let the crock temperature rise until it reaches about 10 degrees ABOVE the target. For example, if the recipe says to pre-heat to 250°F, I let the crock temperature go up to 260°F with the temperature control on full.

The higher temperature will help compensate for heat loss, when the lid is opened to put in the food. The longer is lid is off, the more heat will be loss, so any pan stands or trivets or other oven accessories should be in the cooker as it pre-heats.

4. Remove the lid, put in the food, put the moisture absorbing towels over the cooker, and put on the lid. Move quickly to minimize heat loss. If the recipe requires moisture-absorbing towels under the lid, have them ready at hand's reach.

5. After the lid is put back on, if the crock temperature is still above the target, turn the control down to the calibrated setting for the target temperature.

If the crock temperature has fallen below the target, wait for the temperature to rise back up to the target and then turn the control down to the calibrated setting for the target temperature.

6. Check temperature after 15 minutes. Adjust the control, if necessary, to bring the crock temperature closer to the target. It may take several attempts to stabilize the temperature. My digital remote probe thermometer features alarms that can be set to sound when the temperature approaches, reaches and exceeds the target. The alarms free me from having to watch the thermometer continually.

This temperature control is not a thermostat. Sometimes the crock temperature will refuse to stabilize when baking very wet foods, possibly because dramatic changes in water content alter the thermal characteristics of the food. Crock temperature is steadier when baking bread dough, for example, than a wet cake batter. In the course of baking, I will let the crock temperature fluctuate by as much as +/-10°F, so long as the average temperature is at target. Overbaking is unlikely, because the food absorbs heat gradually and there is time to turn down the heat.

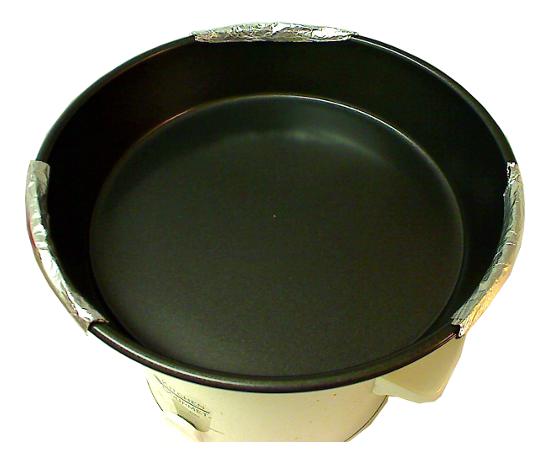
[caption id="attachment_746" align="aligncenter" width="650" caption="DIY Presto Chango Dehydrator With Temperature Control"][/caption]

A slow cooker with a temperature control has adequate precision to incubate yogurt or dehydrate foods directly in the crock in accordance with raw foodist requirements (although my DIY Presto Chango dehydrator shown above with its own temperature control is more thermally stable, has more flat drying space and is expandable). For less than $10 US to build, the temperature control is money well spent.
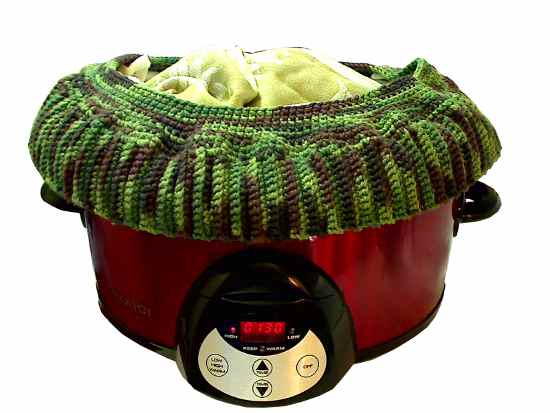
Tuesday, June 22, 2010

Presto Chango: Turn A Slow Cooker Into A Stacking Dehydrator (w/ Apple Chips Recipe)


Revised: Nov. 11, 2010


Contents:

    I. How It Works
    II. Assembly
    III. Testing The Stacked Dehydrator
    IV. Operation
    V. An Idea For Active Convection
    VI. Apple Chips Recipe

The picture above shows two versions of my slow-cooker-powered food dehydrator. On the left is a single-tray dehydrator; the configuration on the right stacks trays in a 2-tier and could be expanded further. The heat source for both is a small 1.5-quart slow cooker (larger sizes can be adapted to the design). Those little gray boxes next to the cookers are DIY temperature controls (not absolutely necessary, except in some types of operation). They constrain the cookers to output a low steady heat. All of the other components are standard kitchen bakeware and accessories, and some of them could be fabricated from poster board or corrugated cardboard to cut costs. A stacked dehydrator could be assembled from scratch for less than $30, including a new cooker and the homemade temperature control. In the last section of this article is a recipe for apple chips, dried in the stacked dehydrator.

On VaporBaker, recipes refer to food dehydrators as dehydration ovens, because the word "oven" suggests a greater transformation in the food as the result of exposure to the low heat - it's baking with warm air. Rehydrated raisins do not turn back into grapes. Beyond camping food favorites like beef jerky and fruit roll-ups, dehydration ovens can produce a wide range bakery-style goods: from cookies to cakes to breads, although the preparation can be distinct to this type of baking. In some VaporBaker recipes, food must be baked in two (or more) stages with one of those stages being in a dehydration oven.

The aforementioned DIY temperature controls is not a thermostat. A good thermostat cycles (turns on and off) heat to keep the dehydrator within a set temperature range. The temperature control doesn't cycle. It tunes the slow cooker to output steady continuous heat, although the temperature can drift. Without a temperature control (or a thermostat), the cooker must be manually adjusted to steady the temperature. There are ways, though, to moderate a cooker's temperature rise (such as filling the crock with water).

A basic slow cooker by itself can dehydrate foods, but without a temperature control, it heats up too quickly (even on the LOW setting) and starts to cook the food. Less than an hour after being turned on, a cooker can burn close to 300°F/149°C. Raw foodists, who cook exclusively with a dehydrator, say that such high temperatures destroy the nutritional vitamins and enzymes in raw foods. They advise that dehydrators should operate in the temperature range of 105-120°F (40-49°C).

The dehydrators in this project can easily reach 120°F/49°C, which will safely dry all foods except meat. Meat that may be contaminated with salmonella or other pathogenic bacteria must first be heated to the sterilizing temperature of 160°F/71°C (165°F/74°C for chicken) and then dried at 130-140°F/54-60°C. The single tray dehydrator is suitable for drying meat. In the stacked configuration, the bottom tray can reach 140°F/60°C, but the top tray will be cooler - how much cooler depends on several factors such as the room temperature, which parts are metal (and therefore lose heat), the distance between the trays. Unless it is clear that a system can handle these heating requirements, I recommend dehydrating meat either inside the actual crock of a large slow cooker with a temperature control or in a commercial dehydrator.

I. How It Works:


These dehydrators operate with convection heat. Heat flows upward from the cooker, spreads out from the heat distributor, up through drying trays and out through the venting cover, carrying moisture with it. The above diagram shows the assembly of a 2-tier dehydrator. A 1-tier setup is minus the separator and second drying tray. Add more tiers by stacking separators and drying trays.

The components are standard kitchenware. All the pans should have the same diameter except that the heat distributor pan can be a little smaller (up to 1 inch) than the others to allow air to enter the bottom of the dehydrator and stoke the air flow upwards. Too much smaller and the gap would let in cold air that would adversely affect the dehydrator's operation.

My dehydrators were built with 9-inch pans. I think I could have enlarged the dehydrators up to 10 inches. Keep in mind that for a given-size cooker, the larger the dehydrator diameter, the lower the internal temperature will be, because of the larger volume of air that the cooker has to heat. A 4-quart cooker with a crock diameter of, say, 8 or 9 inches might be able to heat a larger dehydrator, in terms of tray size and number of trays.

At the bottom is the heat source, a small slow cooker. The pictures show a 1.5-quart cooker with a 7-1/2 inch diameter ceramic crock and base unit (the base unit has been plugged into a temperature control). The cooker can function as a heat source with or without the crock. Without the crock, the dehydrator heats up faster and hotter, and the temperature fluctuates more with changes in ambient temperature. Thus, when the cooker's base heats the dehydrator directly, the cooker MUST be connected to a temperature control to stabilize the temperature. Direct heating also doesn't produce water vapor that could impact the dehydration process as vapor heating does.

In vapor heating, the base unit heats a water-filled crock, which then heats the dehydrator. The dehydrator heats up slowly, the temperature is more stable and the water limits the maximum temperature. The water vapor conducts heat to the distributor more efficiently than air. It also helps stabilize the temperature inside the dehydrator and limits the maximum temperature to the boiling point of water (212°F/100°C). I did try operating the dehydrator with the crock empty. Then, the dehydrator heated up VERY slowly. After an hour, the top tray had not reached 90°F.

The heat distributor spreads the heat energy out to maximize the drying area and catches any drips from the drying trays. In my configurations, the distributors are 9-inch metal cake or pie pans. The pans must completely cover and sit flat on the cooker's base unit or on the crock to maximize heat transfer and, in the case of a vapor-heated dehydrator, to prevent water vapor escaping from the crock. Sometimes, drops of water will occasionally condense at points where the crock and heat distributor pan meet and drip down the sides of the base unit. So long as the drops are few and don't seem to be affecting the dehydration, I merely wipe them up with a sponge. Larger puddles should be dealt with either by reducing the heat or by placing a heat-proof gasket between the crock rim and the heat distributor pan.

The drying trays are metal splatter screens I got in the bakeware aisle of a local market. They cost less than $5 US each (less than $4 when on sale) and were 11 inches in diameter. I've seen them as large as 14 inches. In general, the splatter screens must be larger than the diameter of the heat distributor (eg, larger than the cake pan). Heat from the distributor radiates upward through the mesh and around the food, taking moisture with it. Other fine mesh products could substitute, including screen-door mesh or needlepoint canvas mounted in a cardboard frame. However, splatter screens are already food safe and heat safe.

The separator forms the drying chamber over the first drying tray and holds the drying trays apart. In my 2-tier dehydrator, the band from a 9-inch springform pan serves as a separator. It stands at about 2-1/2 inches tall, which is a bit too high, in my opinion for the majority of foods. The drying temperature drops as the distance between the heat distributor increases. Plus, the metal band itself loses heat. A 1-inch or 1-1/2 band from, for example, a cake pan with removable bottom would reduce the temperature differential and still fit most of the foods that I dehydrate. Lining it with craft foam (sold in 2mm thick sheets) or even plastic food wrap as insulation would reduce it more.

In my 2-tier dehydrator without any insulation, the temperature at the top tray ranges between 15 to 20 degrees (F) cooler than the temperature at the bottom tray. However, when I line the separator with plastic wrap, the temperature differential narrows to 8 to 10 degrees (F). Separators don't need to be metal though. A strip of thick cardboard taped or stapled into a ring would be fine as a separator, and thick cardboard or corrugated cardboard is a better insulator than bare metal.

The venting cover forms the drying chamber for the top drying tray, but also must allow the water vapor to exit the dehydrator. Stacking another separator ring and topping it with a perforated pizza pan could work (a splatter screen might be too open). If the perforations vent too much, block off some of the holes (with a rolled up kitchen towel, for example) to help build up the heat in the top level. In fact, since it won't be holding food, the vent could be a disk of perforated cardboard, cut to fit on the separator. Cardboard also insulates better than metal.

I turned my 9-inch stainless steamer insert upside-down to serve as a 1-piece venting cover. However, the insert is bare stainless steel and 4 inches tall. That large, uninsulated volume contributes to the temperature difference between the top and bottom trays. It would have been a better venting cover if the insert had been only 2 inches tall and lined with insulation like craft foam or plastic wrap. However, the extra space is much appreciated for rising bread dough in the dehydrator.

An inexpensive analog probe thermometer stuck through a hole in the top continuously monitors the dehydrator's temperature. The thermometer is accurate only for the top level; the temperature for the bottom tray must be extrapolated (as explained later).

II. Assembly:


The following instructions apply to the 2-tier dehydrator. For the 1-tier, omit steps 6 and 7.

Parts For 9-Inch Stacking Dehydrator As Shown (see text for substitutions):
  • 1 1.5-quart ROUND slow cooker (if used, the crock having flat top surface)
  • 1 metal cake or pie pan, 9-inch top diameter and bottom large enough to cover the crock or base unit
  • 1 springform or removable bottom pan, 9 x 2-1/2 inches
  • 2 metal splatter screens, 11-inch diameter
  • 1 steamer insert, 9 inch diameter, 2 to 4 inches tall
  • 1 analog instant-read thermometer (0-220°F)
  • wax paper for the tray liners
  • plastic wrap for insulation, if necessary
To Assemble:


A Note About Insulation: I recommend insulating the inside walls of the separators and venting cover for the best heat retention, especially if they are made of metal. The easiest way to do this is to line the insides of each of those components with plastic wrap. I have found that insulating the separator alone in my setup (see picture above) can reduce the temperature difference between trays by 10°F.

The dehydrator will operate fine without insulation even if all the parts are made of metal. In the case of an uninsulated stacked dehydrator, I recommend swapping the trays every few hours so that all the food is exposed to the same amount of heat.


1. Heat source option 1 - base unit direct heating: Remove the crock to heat the dehydrator from the cooker's base unit directly. Skip step 2. With this option, the cooker's base unit MUST be connected to a temperature control.


Heat source option 2 - vapor heating: Fill the cooker's crock with 1/4 to 1 inch of water. Less water generates a higher temperature, but risks running the crock dry sooner, if there are any leaks in the seam between the crock and the heat distributor pan.


2. Optional for vapor heating: During testing, if significant amounts of water and water vapor appear to be leaking from the seam between the crock and the heat distributor, try turning down the heat to reduce the steam pressure inside the crock. If that fails, try placing a gasket between the top of the crock and the heat distributor. The gasket can be cut from a heat-resistant material such as a foam or rubber sheet.

In the picture above, the blue gasket is shown only as an example. My setup does not leak significantly so I have NOT actually tested the gasket with the cooker turned on.


3. Center the heat distributor (cake or pie pan) on the cooker's base or on the crock's rim or optional gasket. If desired, place shims of aluminum foil along top edge of pan to enhance the air flow into the dehydrator (see text above). My testing suggests that the shims are not absolutely necessary.


4. Put a drying tray (splatter shield) on top of the heat distributor and center it.


5. Put the separator (band of the springform pan or removable-bottom pan or a substitute) on the drying tray and center it (take out the bottom first).


6. Place the second drying tray (splatter shield) over the separator and center.


7. Put the venting cover (inverted steamer insert) on the second drying tray and center.


8. Insert thermometer through an opening in the venting cover. In the above picture, a rolled up kitchen towel blocks air holes to maintain the temperature in the top section. The strongest heat flow is along the sides, so the towel is arranged on the cover to block air from the outside inward. Do not block all the vent holes.

III. Testing The Stacked Dehydrator:

Set the dehydrator in a draft-free area. In my stacked setup with an insulated separator, there is an 8 to 10 degree temperature difference between the second and first drying trays. The upper tray is always cooler. I recommend testing the temperature difference in any stacked setup as follows.


1. Assemble the dehydrator, including the separator. Rest the probe of a digital thermometer on the first drying tray, at or near the center. A curved probe works best. A digital thermometer probe will give the most accurate reading because they measure the temperature close to the tip of the probe, where the sensor is located.

2. Complete the assembly of the dehydrator. Turn on the cooker to HIGH and monitor the temperature on the bottom probe thermometer until it reaches 120°F (49°C).

3. Turn the cooker to WARM until the temperature stabilizes for at least 10 minutes. Record the temperatures in both thermometers.

4. In use, the actual temperature differential may vary with the type and amount of food being dried. It may be helpful to run this test one or two more times with the trays filled with food.

IV. Operation:

1. In a stacked dehydrator, the top tray is always cooler than the lower or bottom tray. If the temperature difference is known, then add that number onto the reading to get the temperature in the bottom tray. Drying at a lower temperature does less harm to nutrients in food, so the temperature of the bottom tray should take precedence.


2. Assemble the dehydrator up to the first drying tray or if the dehydrator is already assembled, disassemble it down to the first drying tray.

If the food is liquid or very wet like a granola or fruit leather paste, place a liner on the drying tray and center it. Then pour or arrange the food on the liner. Other foods may not require the trays be lined and will dehydrate faster without a liner. When arranging food on a tray, leave a 1/2 space along the edge so that the heat can flow upward. Solid foods can be placed close together, but try not to let them overlap too much. Some items, like cookie dough, shouldn't touch at all.

3. If the second level is needed, assemble the separator and second drying tray. Then place the food on the drying tray as in step 2.

4. Complete assembly of the dehydrator.

5. Set the heat selector on the cooker to "HIGH" and the temperature control (if used) should be set to maximum.

6. Monitor the thermometer until it reaches about 10°F/5°C below the target temperature (in the stacked dehydrator, estimate the temperature of the bottom tray, which is warmer). Stabilize the heat by adjusting the temperature control (see How to Make and Use a Slow Cooker Temperature Control) or by alternately switching the cooker's heat selector between "LOW" and "WARM".

The temperature control steadies the heat more precisely than manually adjustments of the cooker's heat selector. With a temperature control, the dehydrator can run overnight without being monitored. For overnight operation, first stabilize the heat so that temperature stands still or drifts barely 1 degree over the course of an hour. Then turn temperature control down a little. The system will cool a little, but continue to operate with a higher heat safety margin.

7. Halfway through the drying process, swap the top and bottom trays, so that they are exposed to the same amount of heat overall.

8. Check for water vapor leaks on the crock rim. The vapor may condense into water drops and slide down the side of the cooker. Sponge up any water collected at the base of the cooker. Turning down the heat may stop the leaks. Otherwise, installing a gasket between the crock and the heat distributor may seal the leaks.

V. An Idea For Active Convection:

The dehydrator in this project operates on the principle of passive convection. Heat rises from the bottom of the dehydrator and carries moisture with it up and out the vent at the top. In active convection, a fan accelerates the flow of hot air and the rate of dehydration. In other words, foods dry faster.


It's not practical to install a fan inside this type of make-shift dehydrator, but another idea is to set the fan on top of the venting cover and angle it so that it blows ACROSS (not into) or UP AND AWAY FROM the vent holes. If it blows across the vent holes, the slight pressure difference will draw air up from inside the dehydrator, like smoke pulled up a chimney by the wind. If it blows up, the fan will suck moist air from the dehydrator directly.

I haven't tried active convection on my dehydrator, because I don't have the fan yet. One of those small computer fans might be ideal for this application. The fan should be set on low and blow a very gentle breeze. If the breeze is too strong, the temperatures inside the dehydrator could fall fast.

VI. Apple Chips Recipe:


Apple slices dehydrate in a few hours, much less time than, say, blueberries, which, even when cut in half, will take at least a full day. They are one of my favorite snacks, and very inexpensive if made at home. Other recipes sprinkle them with cinnamon (or other spices) and powdered sugar before dehydrating. I like them plain.

In the pictures, the slices are from a large apple. I arranged them in a spoke pattern for the pictures and could barely fit 10 slices to a tray. That was not the most efficient arrangement. If I had placed the slices in concentric circles, like a bulls-eye, or if I had cut the tray liner with a smaller center hole (nearly 2 inches in diameter in the pictures), I would have been able to fit more. The chips shrink as they dry, so a little overlap is not a problem either.

Makes 20 to 40 chips (depending on apple size and slice thickness)

- 3 to 6 calories per chip
- Oven Temperature: 105-120°F (40-49°C)

Ingredients:

  • 1 medium to large apple

  • 1 cup water

  • 2 teaspoons lemon or lime juice


  • Method:

    1. Assemble dehydrator to level of first drying tray. Center a liner of wax or parchment paper (not aluminum foil) on the drying tray.

    2. Mix water and lemon juice in a small bowl.


    3. Wash and quarter the apple. Cut out the core and seeds from each quarter. Slice each quarter into 1/8" slices and soak them for 10 minutes.


    4. Arrange half of the apple slices on the drying tray. Try different arrangements to squeeze more slices onto the tray. If they won't all fit, then the remainder may have to dehydrate in a second batch.


    5. Assemble the second drying tray and arrange the remaining slices.


    6. Dehydrate at 120°F/49°C, measured at the bottom tray, for 3 hours. On my setup, assuming a 15°F difference between trays, the probe thermometer at the top should read about 105°F. Swap top and bottom trays. If desired, turn chips over to speed drying.


    7. Continue dehydrating for another 3 hours or until chips are at desired crispness.

    8. Remove chips from dehydrator and store in an airtight container.