When a recipe instructs to preheat the oven to 250°F/121°C and the oven is an unadorned slow cooker or worse, a slow cooker with a thermometer probe going under the lid, several hours could pass before it's ready. One reason it takes so long is the heat leaking from the lid, which lacks the insulating layers of the rest of the cooker and sits loosely on the crock rim. A thermometer probe props the lid open and accelerates the heat loss. The age-old solution has been to pile layers of towels over the lid. However, the added weight could crush a probe's cord or damage the probe itself, never mind the precariousness of the unsightly linen pile in the kitchen.
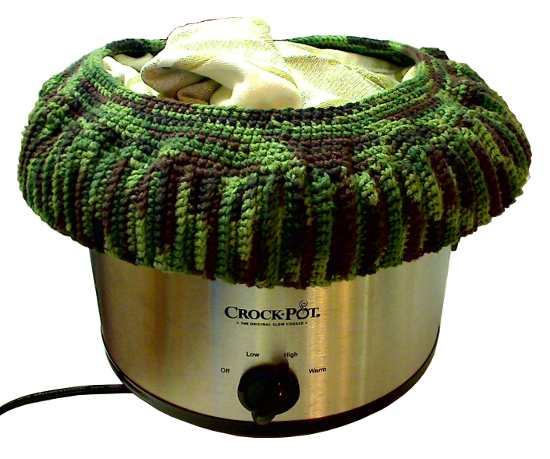
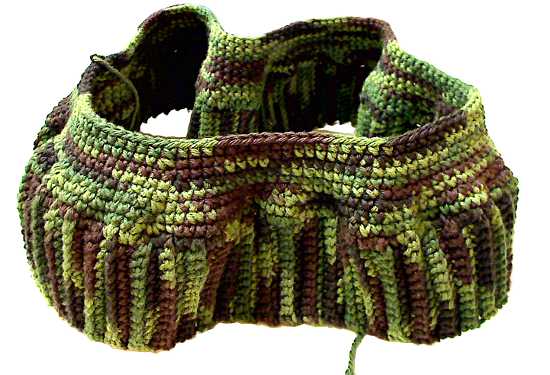
An alternative to the heavy stack of towels is a draft stop. A draft stop for a door closes off the gap between the door and the floor to block the air flow. This crocheted slow-cooker draft stop has a similar function. It's shaped like an open crown hat. The opening is stuffed with a dish towel to seal the gap between the lid and crock and to add a layer of insulation over the lid. It features a ribbed band that will stretch to fit cookers from 36 to 40 inches in diameter, the sizes of my 5-quart round and 5.5-quart oval cookers. The draft stop is crocheted with 100% cotton 4-ply yarn, which is machine-washable and dryable. The specified crochet needle is 4 sizes smaller than recommended for the yarn to produce a thick, insulating fabric.
Although the draft stop by itself will help retain heat, a dish towel insert greatly improves the performance. For those who'd like to made this an all-crochet project, the dish towel could be crocheted too. At one point, I considered crocheting circular and oval towel inserts (possibly in a larger, lighter-weight gauge) for my respective cookers. I would always opt for the 2-piece draft-stop plus towel insert, as opposed to a single-piece closed-crown design. The towel insert can be lifted out to peer into the crock, so the 2-piece draft stop doesn't interfere with the functionality of that glass lid as a one-piece might.
Fast crocheters could complete this project in a day. If I were to do it again, I'd widen the ribbed band by another 4 stitches or so for a more secure fit over my oval cooker. No other complaints though, as the draft stop is in constant rotation between my two large cookers. The pattern includes instructions for modifying the draft stop for other cooker models. It could easily be expanded to a full-size slow cooker cozy that would increase the energy efficiency of the cooker for baking and keep foods warmer when the cooker is unplugged. The challenge would be to crochet openings for the cooker's handles and heat selector knob or digital control panel - not difficult to do with a bit of thought.
Note: this pattern is very forgiving. Test fit the draft stop at each stage. A dropped stitch here or there should not mar the outcome.
Gauge: 5 sc sts per inch and 6 sc rows per inch
Materials:
- 2 skeins Sugar'n Cream 100% cotton yarn (3oz/80gr and 150yds/138m)
- 1 crochet hook (size D/3.25mm)
- 1 lightweight dish towel, a few inches larger than diameter of slow cooker
- ch : chain
- sc : single crochet
- slst : slip stitch
- dec : decrease stitch
- p/u : pick up
- x : times (eg, 3x = 3 times)
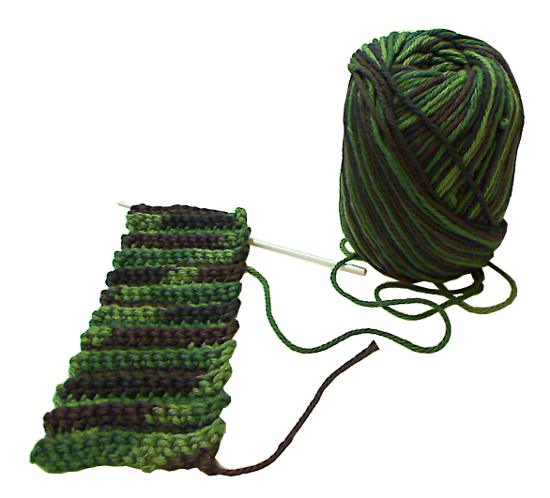
A. The Elastic Side Band or Crown
The ribbed band is about 2 inches wide. For a wider band, increase the number of stitches in the foundation chain. Row 2 onwards is done in ribbing stitch. The length of my band was about 43 inches or 86 rows.
Foundation: ch 13.
Row 1: sc in 2nd ch from hook, sc to end, ch 1, turn (12 sts, excluding last ch 1).
Row 2: sc to end, back of loops only, ch 1, turn.
Row 3+: repeat row 2 until desired length, ending on an even row.
Finish band: holding ends together, right side out, sl st ends together to form band, ch 1.

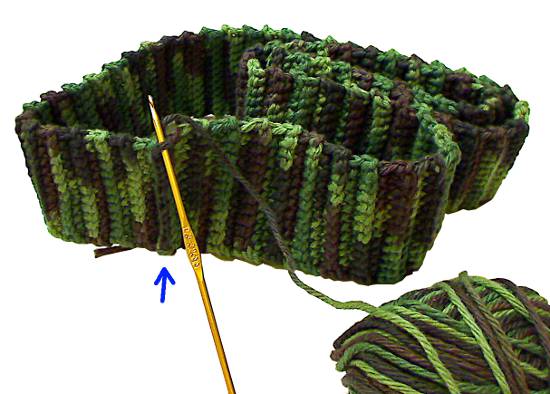
B. Curving the Crown Inward
Although the draft stop is shaped like an open crown hat, a few inches of a top (a.k.a. the "tip" in millinery terms) is crocheted, like a flap, extending far enough to cover the rim of the cooker's lid. In this section, the foundation for the top is attached to the crown and then is built up leaning perpendicular to the crown.
After the ch 1 in the Finish band row, begin by picking up stitches along the top edge of the band. I did this at a rate of about 6 stitches per inch of ribbing for a total of 254 stitches. The exact number isn't critical. A 1 or 2 stitch difference won't affect the finished project, but a drastic difference could. Too few stitches and the band won't fit over the cooker. Too many stitches and the fit will be too loose. I had to re-do the pick-up row several times to get an even distribution of stitches.
Once the pick-up is done, decrease stitches in successive rows to curve the crown inward and form the foundation for the top of the draft stop. The curve has to turn sharply inward or the draft stop won't cover the cooker's lid adequately. There are many ways to choose the number of stitches to decrease. Here's how I did it.
To keep it simple, I decrease the same number of stitches each row. By trial and error, I chose a number that is 14% of the number of stitches picked up along the band's edge. That is, for 254 stitches, the number of decrease stitches per row is 36.
Foundation: p/u sc sts along edge of band (254 sts or approx. 6 sts per inch), slst join and ch 1.
Row 1: (sc 5, dec 1) 36x, sc to end, slst join, ch 1. (218 sts remaining)
Row 2: (dec 1, sc 4)36x, sc to end, slst join, ch 1. (182 sts remaining)
Row 3: (sc 3, dec 1)36x, sc to end, slst join, ch 1. (146 sts remaining)
Row 4: (sc 1) around, slst join, ch 1. (This is the last bending row.)

C. Build The Top Flap
The final rows further develop the top of the draft stop. Unlike the previous section, the goal here is to crochet a flat disk growing inward. I figured out the rate of stitch decrease with some math to narrow the range and then by trial and error. The repeating pattern is one row of stitch decreases followed by one row of straight single crochet.
[Row numbers continued from section B]
Row 5: (sc18, dec 1) 7x, sc to end. (139 sts remaining)
Row 6: sc to end.
Row 7: (dec1, sc17) 7x, sc to end. (132 sts remaining)
Row 8: sc to end.
Bind off.
D. How To Use The Draft Stop
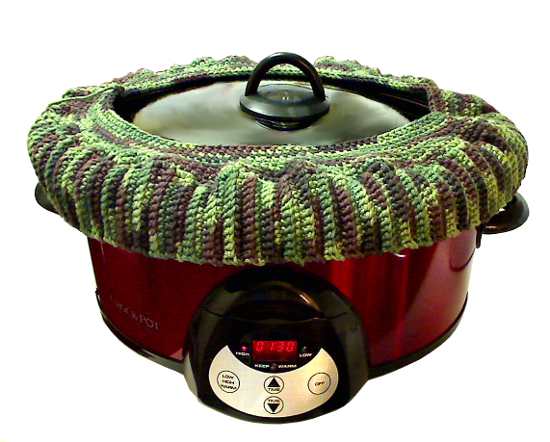
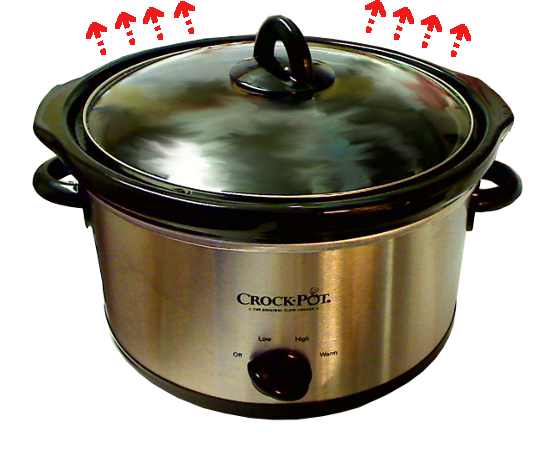
The two pictures above show my 5.5-quart oval cooker. In the second one, the draft stop is slipped over the top of the cooker without a towel insert. It's important to press the top of the draft stop down over the lid, so that it impedes as much heat loss as possible. Although the draft stop doesn't lie completely flat against the lid, in my tests, it reduced the preheat time by up to 20 minutes.
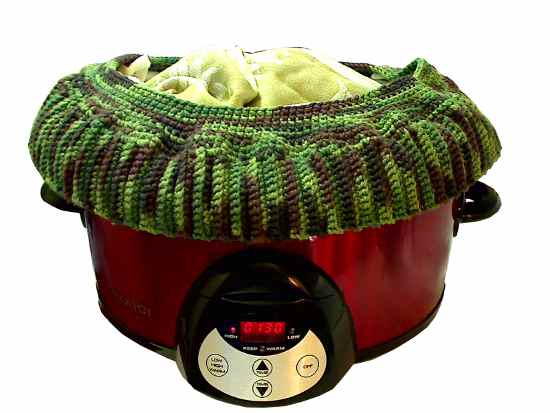 Inserting a small dish towel into the opening the draft stop (and spreading it out over the lid) reduced the preheat time by another 10 minutes - a total reduction of 30 minutes (or 30% of the regular preheat time).
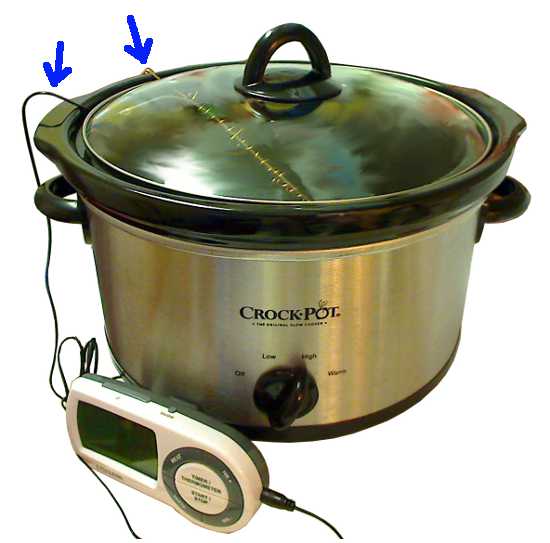
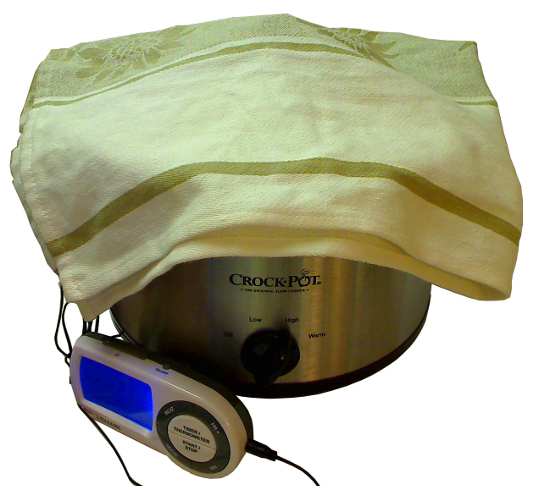
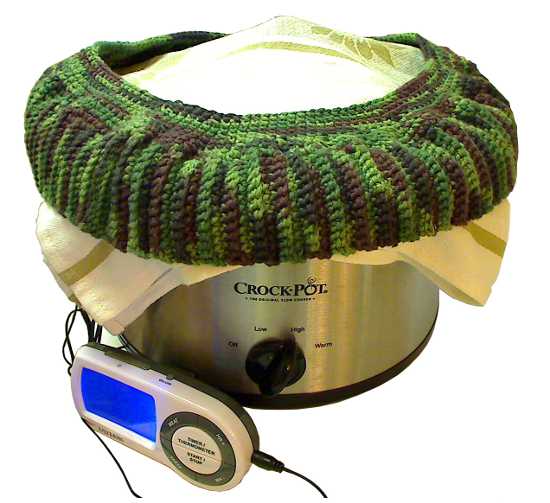
The following 3 pictures show my 5-quart round cooker with a remote thermometer probe going under the lid. The probe's cord and the wire hook that latches the probe in place prop the lid up and prevent it from seating properly. Without a draft stop, pre-heating this cooker setup would take a very long time. In this procedure, a dish towel is laid over the cooker first and the draft stop over that. Either way is effective, but the latter ensures that the gap created by the thermometer's cord and wire are completely covered before the draft stop clamps the towel down.
No comments:
Post a Comment