
[ Equipment: oven or slow cooker with temperature control. For more information about the terminology in this recipe, see Low Temperature Baking: A Journey of 3 Paths ].
Revised on November 26, 2010.
Happy Earth Day!! (It's still April 22 in the US as I post this.) Before I discuss this recipe, I want to say that more recipes are coming. Low temperature baking consumes time, and I don't post a recipe until I'm satisfied that I would make it again. I'm also setting up a DIY project and will report on that too.
This recipe was my first large-size slow-baked bread, a 7-inch focaccia, close the to maximum diameter that my LTB oven (slow cooker) will accommodate. It's a soft bread with a colorful crust and a melding of flavors like bakery pizza. The revision presents new methods for LTB baking wet doughs and eliminates the toasting step of the original, if the focaccia is served immediately.
I chose a flatbread, because it bakes relatively quickly, and specifically a focaccia because it's an oil dough with hundreds of recipes online for me to study. The basic dough formulation was the same long fermentation, wet dough in my slow rise, no-knead steamed buns, with a little less hydration and molded into a flat bread in a cake pan. I appreciated slow rise doughs as the next best thing to sourdoughs, which had a low-glycemic index (a "good carb") because their acidity slowed the absorption of glucose into the bloodstream. Plus, the tang of long fermentation blended well with the tomato and basil flavors.
At one point during the test bakings, I was tempted to go back to a kneaded dough due to issues with baking wet doughs at low temperature. In some loaves, the interior of a loaf remained uncooked, while the outside baked rock hard. In others, the texture was coarse and needed toasting before serving to transform the crumb and develop the flavors. I believe that the moisture in the dough was taking too long to bake out and was gelatinizing the crumb. Steamed buns made with a wet dough cooked up light and fluffy, because steam cooks faster, although with a different amalgamation of flavors than from the hotter temperatures.
As my first corrective measure, I halved the recipe to make a thinner focaccia (3/4-inch thick), so that it would bake faster (recipes for thicker focaccias are on their way). For the second corrective measure, I cut back the hydration to around 76% (by weight) to shave more minutes off the oven time. By comparison, the hydration level in the steamed bun dough was over 90%. At 76%, the dough could still be regarded as a "wet" dough, just not as wet. Any less water, the dough would have to be kneaded, and the lack of moisture would impede the rising (slow-rise doughs start off with a pinch of yeast).

The hydration level is so important that I list in the recipe precise amounts of water and flour, even though the actual hydration may vary with different brands and batches of flour. It's hard to distinguish the texture of a coarse bread in pictures, but there are other indications in the finished loaf. The picture above shows 2 focaccias, the one on the bottom being over-hydrated and possessing a coarser texture. Comparing them for visual distinctions, the top focaccia has a more rounded surface, especially at the edges. Hard to see in the image, the crust on the over-hydrated bread appears thickly varnished with a starchy glaze.
Low temperature baking is all about the efficient use of heat. For my third corrective measure, I turned to an idea first tried in my Water Roux White Bread: baking in a vented, covered pan to control the evaporation of water. (The water-roux bread recipe is dated later than this one, but it was my success with that bread that pushed me to revise this recipe.) My experience with the water-roux loaf enlightened me as to the possibilities of LTB bread.

For the water-roux bread, I covered the pan with aluminum foil and evenly perforated it with a wood skewer. The dough rose and flattened itself against the foil, pullman-style. The foil controlled the release of steam and facilitated browning. While the water-roux loaf pan was the same height as the baked bread, my 7-inch cake pan (with removable bottom) was over 3 inches tall, so the focaccia would never fill it. Besides, a shorter pan would have flattened the focaccia, a bread famous for its craggy surfaces.

In addition to controlling the release of steam, the foil aids in browning, if it actually touches the dough. For the focaccia, I had an alternative solution for browning (see below). The remaining issue, then, was how to optimize the release of steam. In the picture above, I covered the cake pan with foil and perforated it in a spoked pattern. The bread came out wrinkled in the center, suggesting a build-up of moisture at the center. From that result, I got the idea to make a single large perforation at the center and a few small holes around it to keep the edges of the bread moist until the center finished baking.
This was my first bread made with a rapid-rise yeast. The dough should ferment and rise with either rapid-rise or active-dry yeast, so long as it is fresh (not expired or previously exposed to moisture). My initial impression was that rapid-rise yeast may give a loftier rise, but active dry yeast gives a bit more tang. Rapid-rise yeast leavened faster too.
The golden tone in the top crust is not from heat alone. Unlike the water-roux dough, the focaccia dough never touches the foil covering the pan and will not brown significantly without a browning agent. I brushed the top of the focaccia with an alkalized water or oil solution before baking. For the water-based solution, I took a little of the soaking water from rehydrating dried basil. The sun-dried tomato water worked too, but the crust turned a reddish brown. Alkalized olive oil was also a great browning agent. Initially, I was hesitant about trying alkalized olive oil, thinking it might trap moisture in the dough. While the alkalized solutions don't produce the dark, thick, crispy crust of a regular focaccia, it does complete the presentation to the eyes and the mouth - and without adding the off-flavors of other browning agents.
I got the idea for the alkalized solutions while making Chinese steamed buns, after observing that mixing baking soda into the dough after the first rise caused brown streaks in the buns. Alkalized dough browns at a lower temperature; it's the same process for coloring pretzels dark brown by dipping them in a baking soda solution. Maillard reactions in browning (specifically the binding of sugars to the amino acid asparagine) are responsible for the formation of acrylamides in baked foods, but in this recipe, the bread was slow-baked at 250°F/121°C, which is so cool that only minimal amounts of acrylamides form. In any case, the alkalized solution can be omitted if no browning is desired.
 In the picture above, the top focaccia was brushed with alkalized basil water, the one on the bottom with alkalized olive oil. Between oil and water, the alkalized oil loaf darkened a little more. The alkalized water crust was perhaps a tad drier and crisper and more even-toned, possibly because the water spreads easily.
 The recipe specifies 1 teaspoon of alkalized olive oil or basil water. Oil doesn't spread as easily as water, and it may be necessary to double the amount of alkalized olive oil for adequate coverage. Avoid brushing on too much of the water or oil, which could impede formation of the crust or create a crust with a starchy surface. Steps 10-12 in the recipe show two focaccias: the top one brushed with alkalized basil water and the bottom one with alkalized olive oil.
I recommend serving the focaccia while it's still warm. As with the original recipe, toasting enhances the bread flavors (unlike the original, it's delicious without toasting, if served immediately). As the bread ages, a light toasting brings it back to life.
Makes 6 servings
- 70 calories per serving
- Oven Temperatures: 250°F/121°C
Dough:
- 3/4 cup all-purpose flour (4 oz.)
- 1/4 teaspoon salt
- 1 teaspoon sugar
- 1/8 teaspoon dry rapid-rise yeast (see text)
- 1/4 to 1/2 cup warm water
- 1 teaspoon extra virgin olive oil
- 1/2 teaspoon dried basil or 1 teaspoon chopped, fresh basil
- 4 sun-dried tomato halves
- 1/2 teaspoon dried basil or 1 teaspoon chopped, fresh basil
- 1/8 teaspoon baking soda
- coarse salt for sprinkling
- 1 teaspoon extra virgin olive oil or basil water (from rehydrating dried basil - see text)
- 1/8 teaspoon baking soda
a. Sun-Dried Tomato Strips


b. Rehydrated Dried Basil (only if fresh basil not available)


2. Drain, but reserve 1 teaspoon of soaking liquid for alkalized basil water (see next).
c. Alkalized Basil Water/Olive Oil
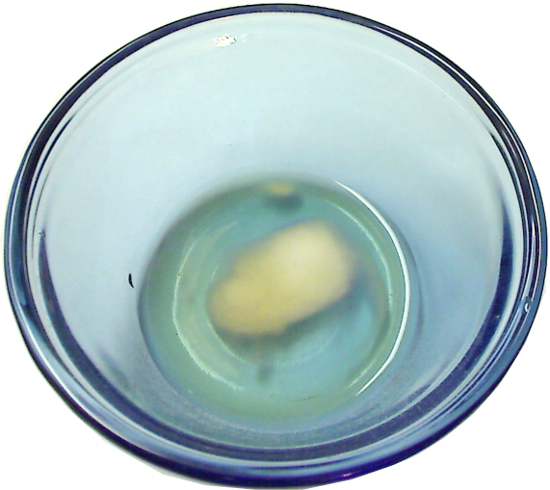

 1. Mix the flour, yeast, salt sugar in a medium bowl until well combined. In the picture above, the bowl is a 6-cup (7 x 3 inches) plastic bowl with straight sides and a lid.
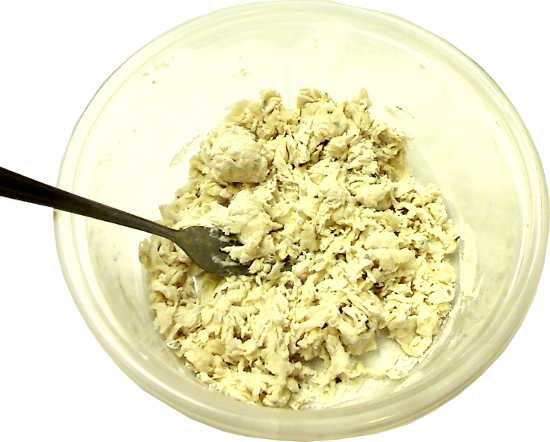
2. Add olive oil and 1/4 cup of the warm water. With a fork, gently toss the flour and liquids to form a crumbly or piecemeal mixture. If the mixture forms a dough, pull the dough apart into small pieces.

3. Continue adding water 1/2 teaspoon at a time until the mixture JUST forms a spreadable dough (about 5 to 6 teaspoons for 4 oz. of flour mixed with dried basil, or less if mixed with chopped, fresh basil). It should spreadable, but not easily spreadable. With the back of a spoon or a fork, spread the dough into a disk on the bottom of the bowl (in the picture, it's a 6-inch diameter circle, about 1/4 inch thick).


4. Cover the bowl with the lid or plastic wrap. The dough must remain wet during the rising. Let rise for 12 to 18 hours until triple in height or more. The top of the dough should appear bubbly, craggy, with a few peaks and valleys. If the dough has a relatively flat surface, it may be over-hydrated.

5. Transfer the dough to a greased 7-inch springform pan or cake pan with removable bottom. With fingers or the back of a spoon, spread dough out to 6-inch circle. Moistening the fingers or spoon with water will prevent the dough from sticking. Allow the dough to rise until 3/4 inch high - about 4 hours.

6. Brush the top of the dough with the alkalized basil water. Sprinkle with coarse salt.

7. Place clumps of tomato strips on top of dough.


8. Sprinkle dough with chopped fresh basil. If using rehydrated dried basil, pick up pieces of basil with a pastry brush and holding it over the dough, gently tap the brush against a fork or other utensil to flick to particles of basil onto the dough.

9. Cover the pan with aluminum foil and secure by tying a string around the rim of the pan. With a 1/8-inch wood skewer, poke about 10 evenly spaced holes, 2 inches in from the rim. With a knife, poke a 1/2-inch hole in the center of the foil. Bake at 250°F/121°C for 40 minutes.


10. Bread is done if a probe thermometer inserted in the center of the bread reads 205°F/96°C or higher. In the picture above, the first is a focaccia brushed with alkalized basil water, the second with alkalized olive oil.


11. Cool the bread in the pan for 10 minutes. Then unmold.


12. Serve immediately. If served the following day, I recommend toasting slices.
No comments:
Post a Comment